Smart Lists can be set up to only be accessible by specific members of your club based on their access level.
Log in to your account through your club homepage, then click on Member Area on the top right under your club banner. Alternatively, click here to go directly to the ClubRunner login page.
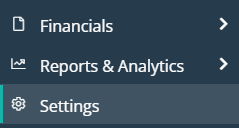
Once logged in, click on Settings in the left-hand side menu.
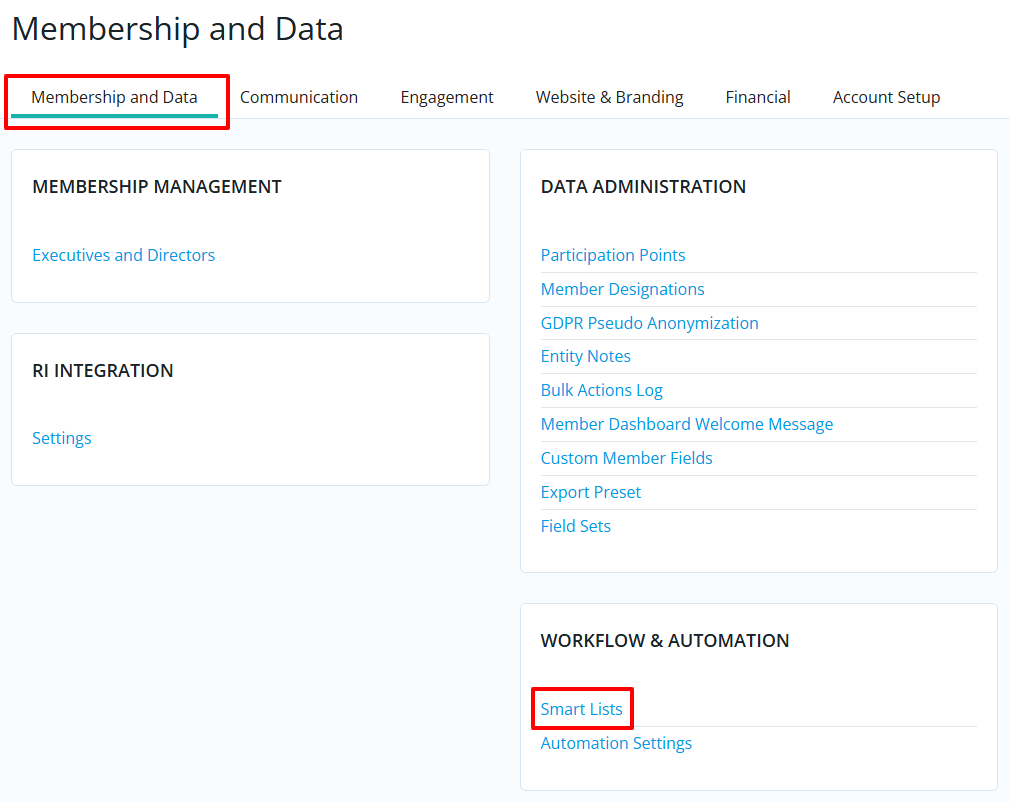
On the settings "Membership and Data" page, look for the "Workflow & Automation" section and click the Smart Lists link.
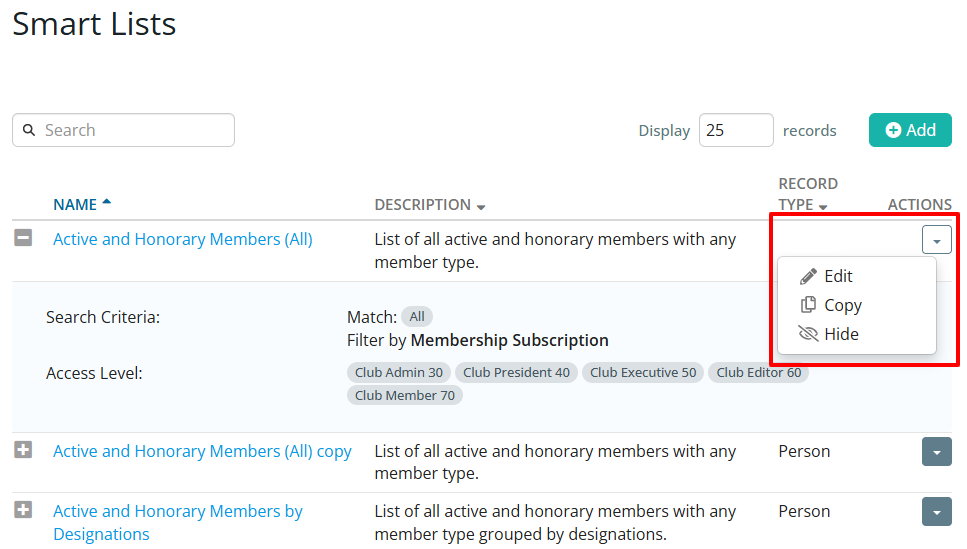
You will now see all the smart lists that exist in the account. You can click the plus (+) icon to expand each smart list to show the current access level settings and it's filters.To edit the access level settings, click the down arrow button and select Edit next to the smart list you'd like to edit.
 Note
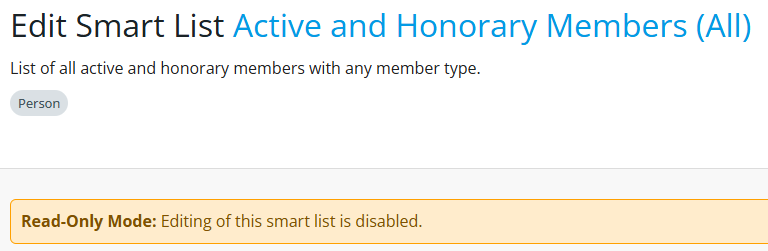
NotePlease note that not all smart lists can be edited, some are system generated and will show a message stating that they are read only and editing is disabled.
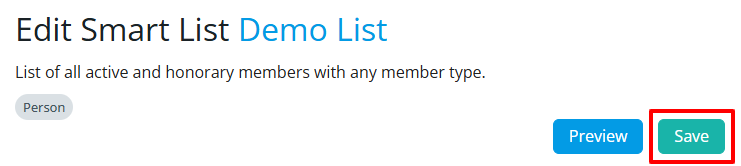
Now you're on the edit page for the selected smart list. On the right side of the page in the "Smart List Settings" section, "Properties" tab, you'll find the Access controls.
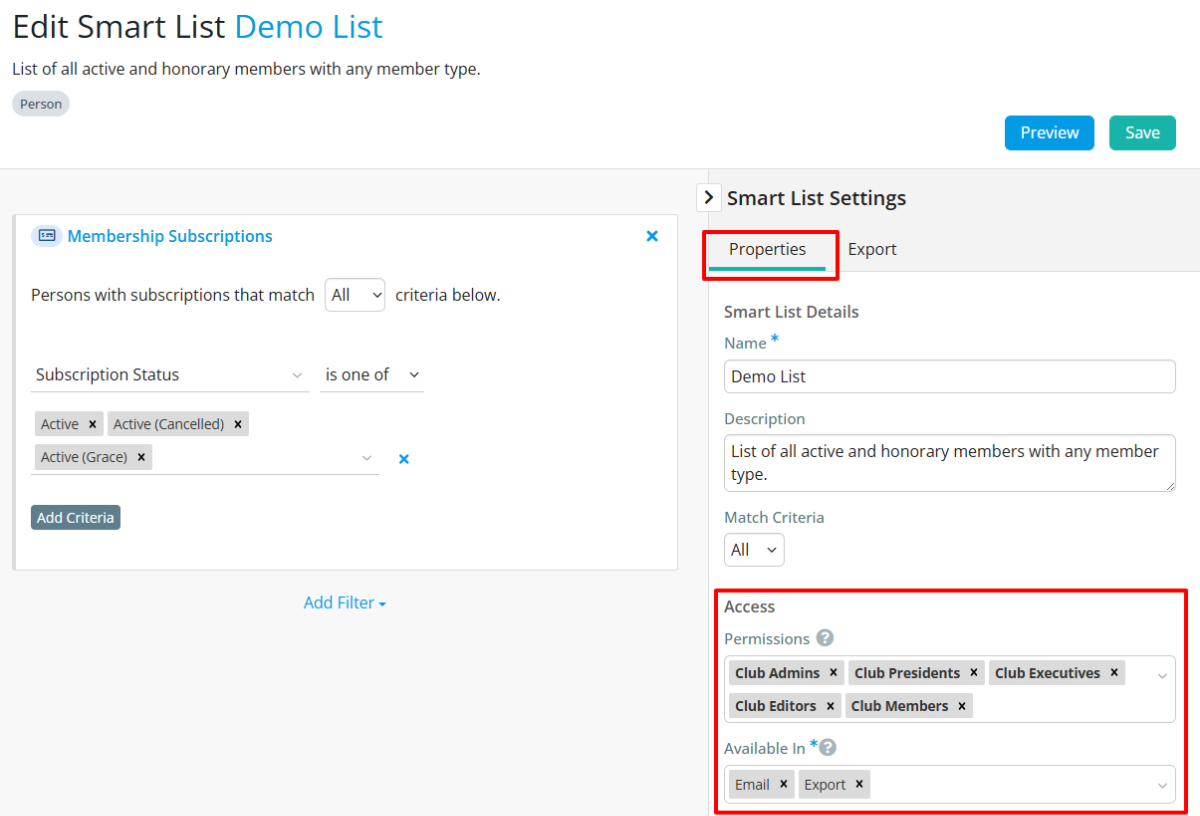
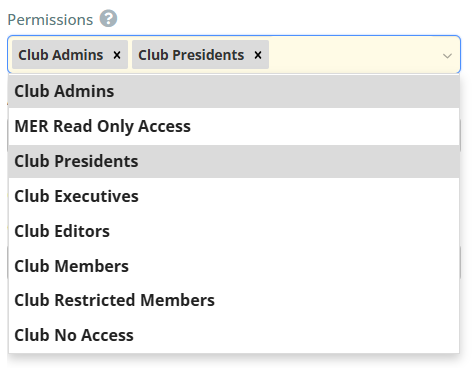
Permissions: This allows you to set which member levels have access to the smart list. You can select as many options from the dropdown list as needed. Clicking the "X" next to the access level title will remove that option from the list. Once you select a certaing Permission option, only members with that access level will be able to use this Smart List. As an example: "Club Executives" permission means Club Administrators will not see this Smart List option when composing an email, or exporting certain information, until this access level is added under permissions, too.
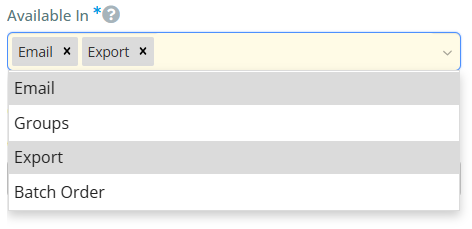
Available In: This controls which modules of the account the smart list is available in. You can select as many options from the dropdown list as needed. Clicking the "X" will remove an option from the list.
Remember to click the Save button in the upper right corner of the page to save any changes you make to the smart list access settings.