
ClubRunner Nova allows you to export financial invoices and payments to a CSV file that you can manually import into QuickBooks.
Exporting Invoices
-
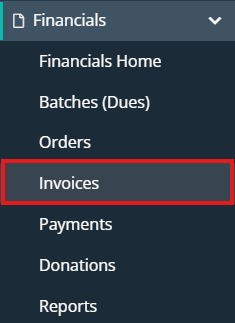
To navigate to the Invoices screen, on the left-hand menu click the arrow to the right of Financials, then click on Invoices.
-
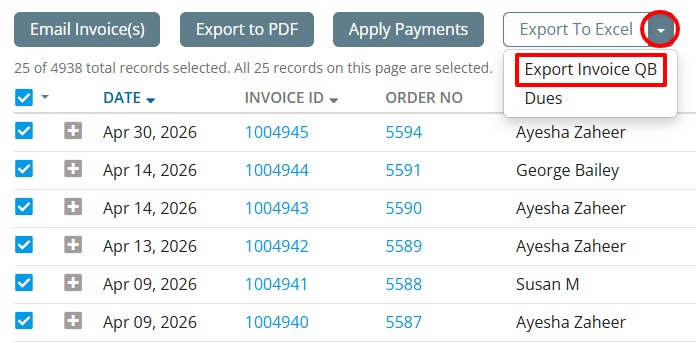
Click the check box next to the invoices you want to export. You can use the check box at the top of the list to select all invoices from the current page or all invoices in the account.
-
With all invoices checked that you want to export, click the arrow icon on the right of the Export To Excel button, then select Export Invoice QB from the dropdown.
-
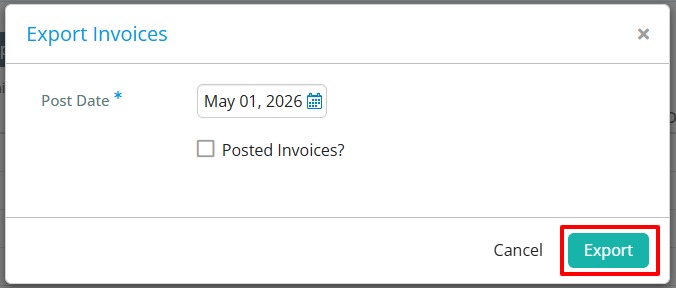
A pop-up will appear where you can set a post date, and check an option labelled "Posted Invoices". This option will mark the invoices as posted with the associated date, so you'll know from the invoice list view that they have been exported. Click Export to start the download of the CSV file that you can then import into QuickBooks.
Exporting Payments
-
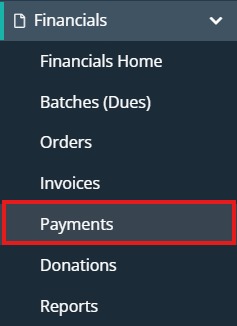
To navigate to the Payments screen, on the left-hand menu click the arrow to the right of Financials, then click on Payments.
-
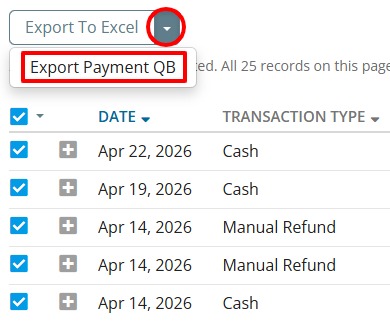
Click the check box next to the payments you want to export. You can use the check box at the top of the list to select all payments from the current page or all invoices in the account.
-
With all payments checked that you want to export, click the arrow icon on the right of the Export To Excel button, then select Export Payment QB from the dropdown.
-
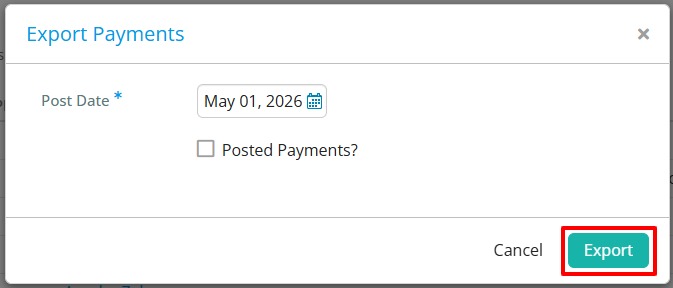
A pop-up will appear where you can set a post date, and check an option labelled "Posted Payments". This option will mark the payments as posted with the associated date, so you'll know from the payments list view that they have been exported. Click Export to start the download of the CSV file that you can then import into QuickBooks.
QuickBooks Resources
United States:
- Manually upload transactions into QuickBooks Online
- Import multiple invoices at once in QuickBooks Online
Canada: