We've now made it as easy as possible to share your organization's Facebook page via the Facebook Page Plugin.
The Facebook Plugin widget will automatically post updates and notices made on the Club's Facebook page and make them available on the page with the Plugin.
This widget may only display Facebook Page content. Facebook Groups do not work with Facebook's page plugin.
While designing the club’s Home page or custom page, the Facebook Plugin widget can be dropped onto the page from the Bulletin & PR widget group in the designer.
When set with the club’s Facebook URL in the widget’s properties, the plugin will display the club's total Facebook likes, profile banner, and recent posts and pictures, if enabled.
For more information on how to add this widget to the home page, or a custom page, please use the steps below:
Navigate to your club website. Then click Member Login at the top right.
After logging in click the Member Area link in the top right of the organization home page.
Inside the member area, click Website in the top blue bar.
Next, choose where to add the Facebook Plugin Widget:
For the Home page: click Home Page Designer in the grey bar below.
For a new Custom page: in the grey bar below click, Designer Home in the grey bar below. Then, on the following page, click the blue Create Page button.
For an existing Custom page: in the grey bar below click, Designer Home in the grey bar below. Then click the View Pages button on the right-side of the page. In the ‘Custom Page Library, hover-over the page, then click the blue Open button.
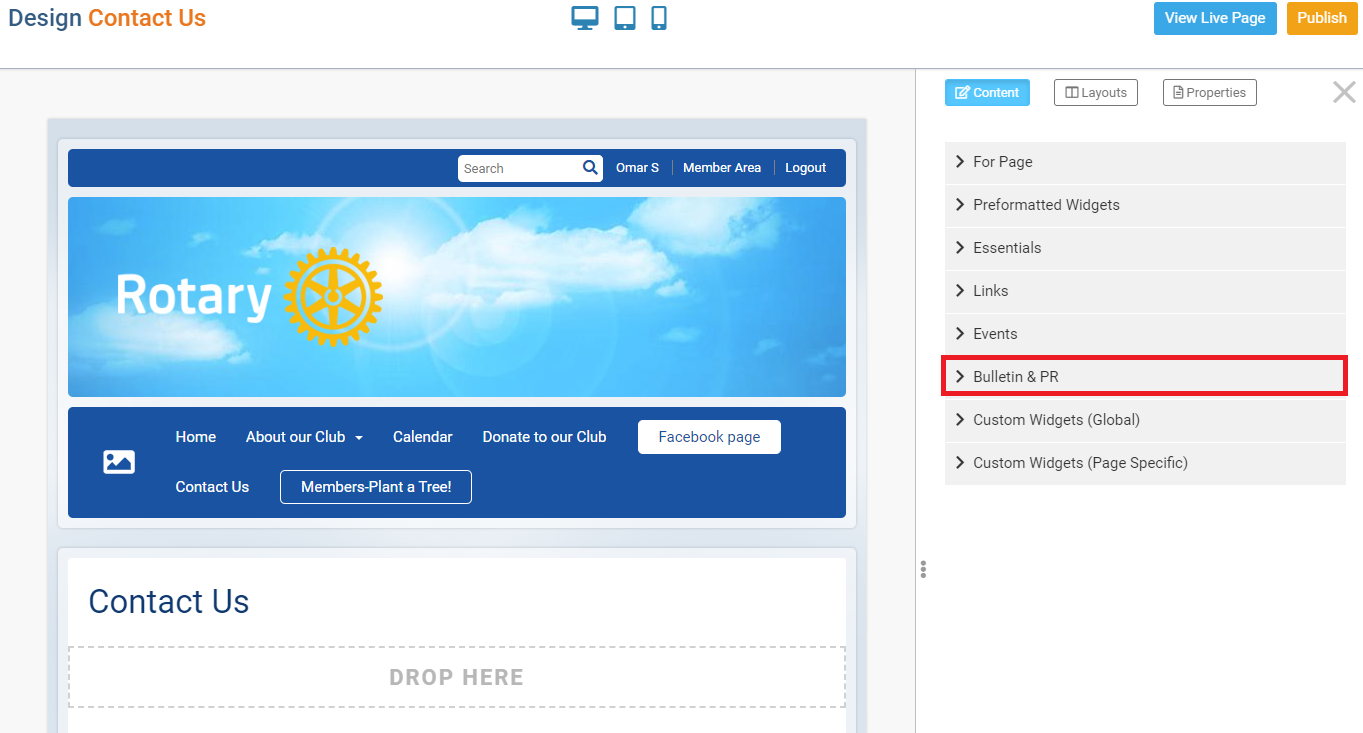
Once in the designer for the page selected in step 4, click the Bulletin & PR widget group in the Content section of the page designer.
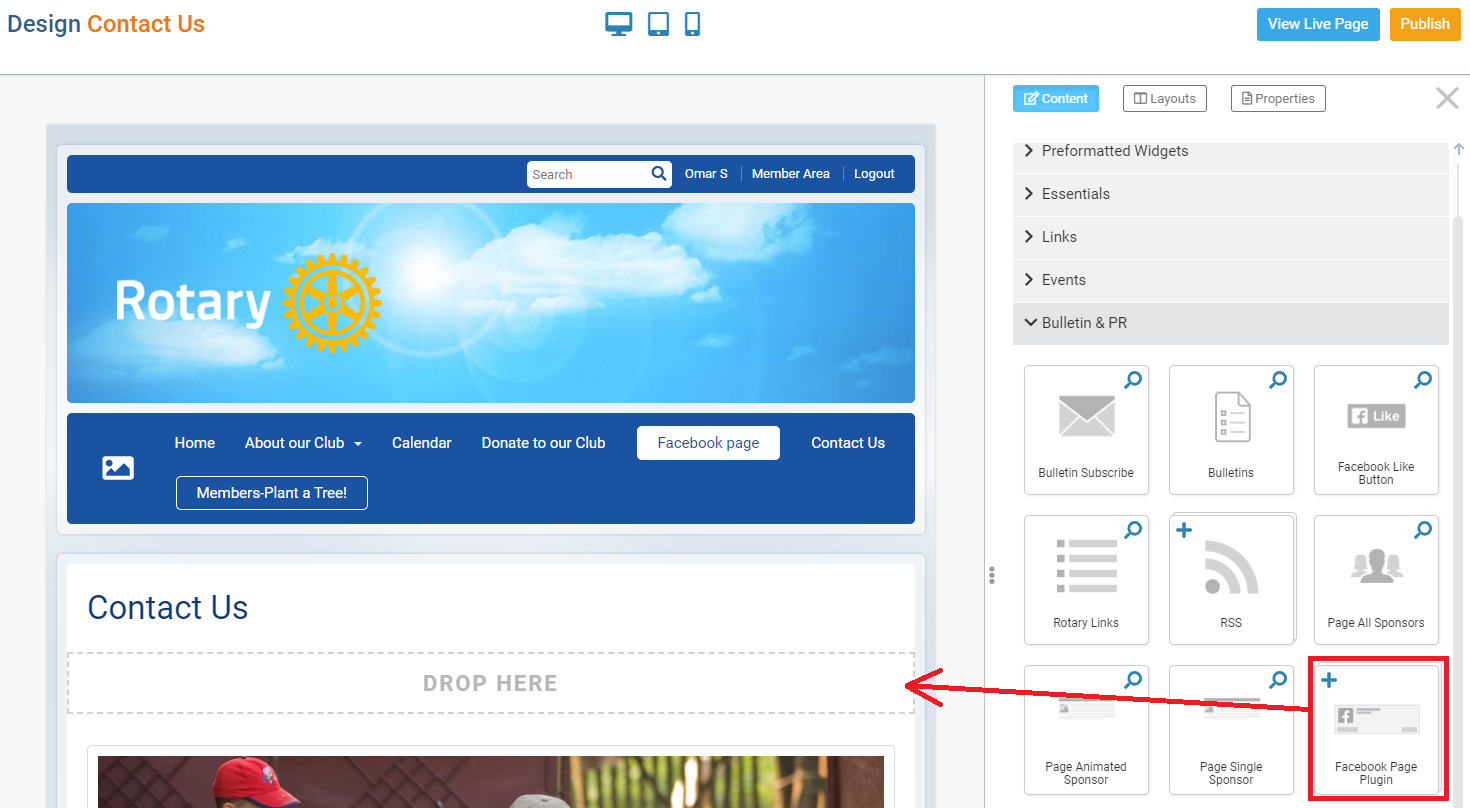
Then, in the Bulletin & PR grouping click-and-drag the Facebook Page Plugin widget into place. Let go of the primary mouse button to 'drop' the widget.
 Note
NoteWidgets can be dropped above or below any existing widget on the page. A green-shaded Drop Here box will appear, displaying where the widget will drop to.
With the widget on the page, hover over the widget and click the Gear icon in the top right to set the properties.

A dialog box will appear with the title Properties for Facebook Page Plugin. At the top of the dialog box you will see some generic widget properties such as Padding, Border styles and settings. To configure the Facebook Plugin widget, scroll to the bottom of the dialog.
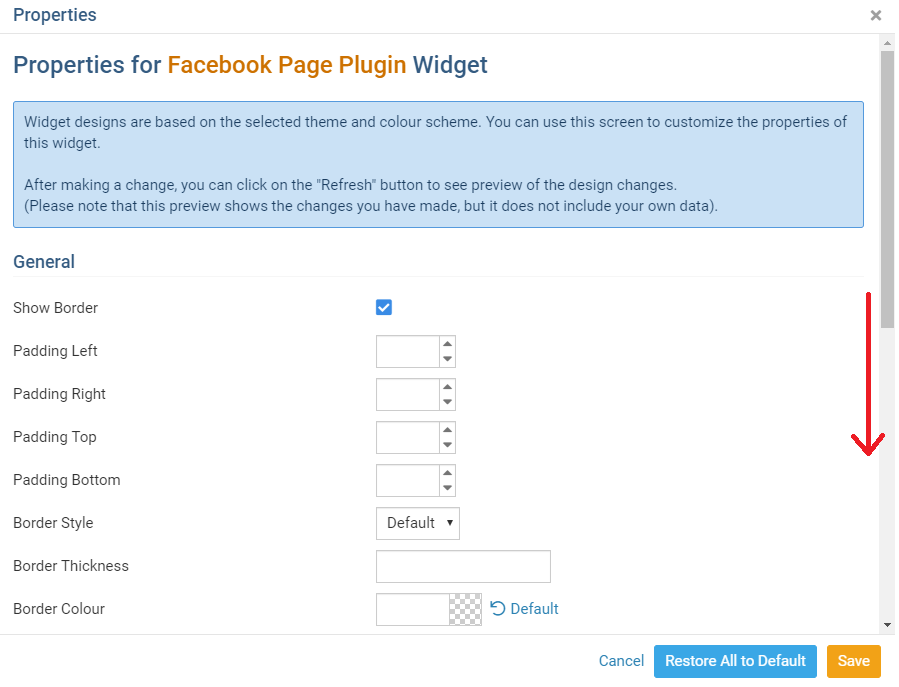
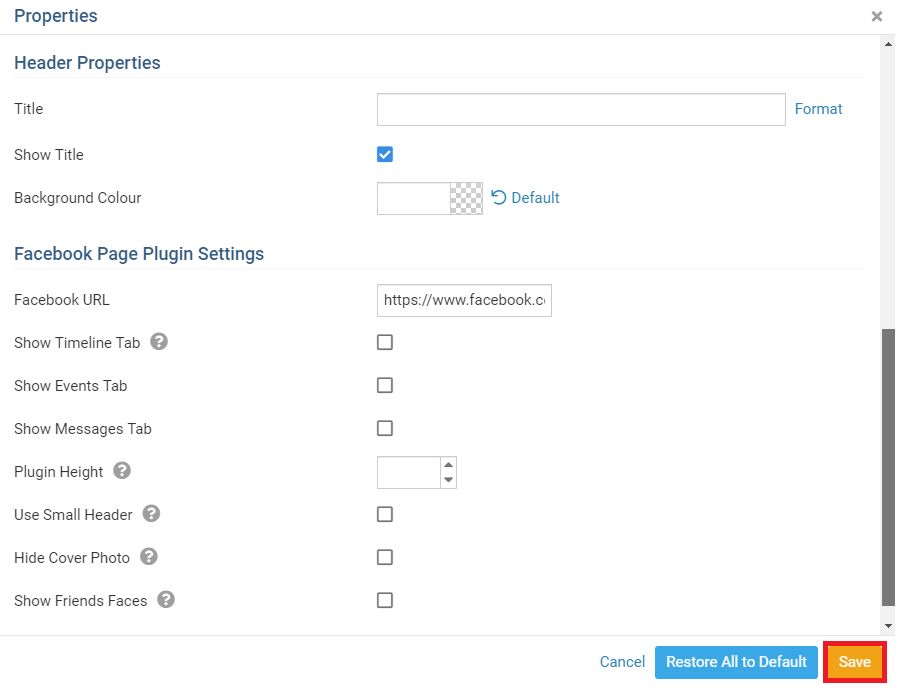
In the properties dialog, the Header Properties section can be used to set a title to the widget, as well as provide background colour and hide option for the title.
Configure the plugin by copying and pasting the club's Facebook homepage URL. For our example in this guide, the full address is 'https://www.facebook.com/facebook'
Set the display options for the plugin. See details below for each option in the Facebook Plugin Settings
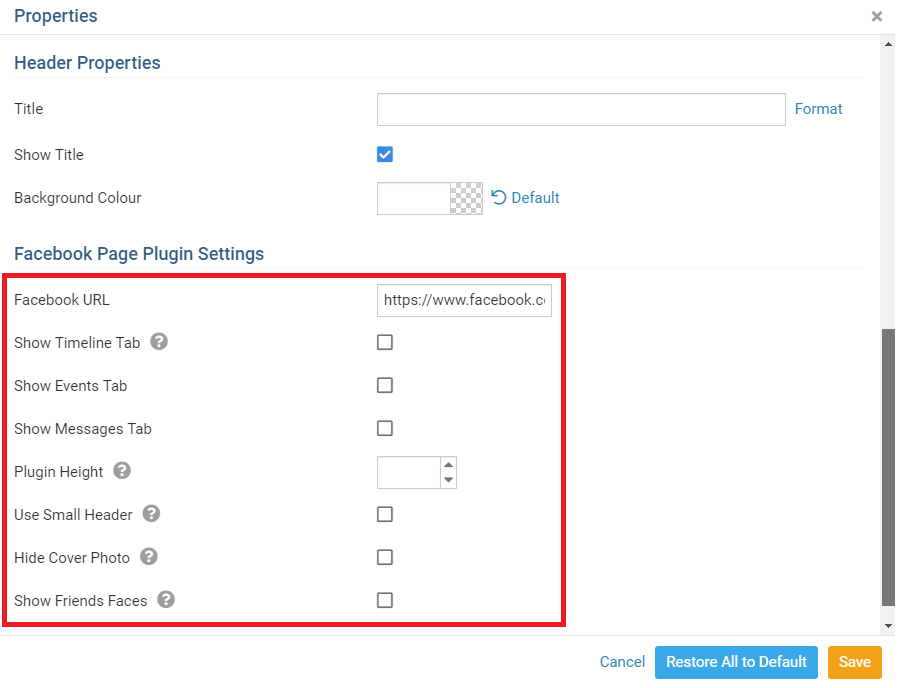
- Facebook URL: Enter the club's Facebook page URL to configure the plugin.
- Show Timeline Tab: Display the Facebook Timeline information in a tab on the plugin.
- Show Events Tab: Display the Facebook Event information in a tab on the plugin.
- Show Message Tab: Display the Facebook Messages information in a tab on the plugin.
- Plugin Height: Set the Plugin Height in pixels. Leave this field empty to allow the plugin to manage the Banner image size.
- Use Small Header: Uses the Small Header version of the plugin.
- Hide Cover Photo: Hides the Facebook Banner or Profile picture in the plugin.
- Show Friends Faces: Displays the list of Friends and their profile pictures within the plugin.
With the Widget Properties set, click the orange Save button to save the widget settings.
With the Facebook Plugin set, review the Custom page or Homepage, then click the Publish button to publish the Facebook Plugin and any changes.
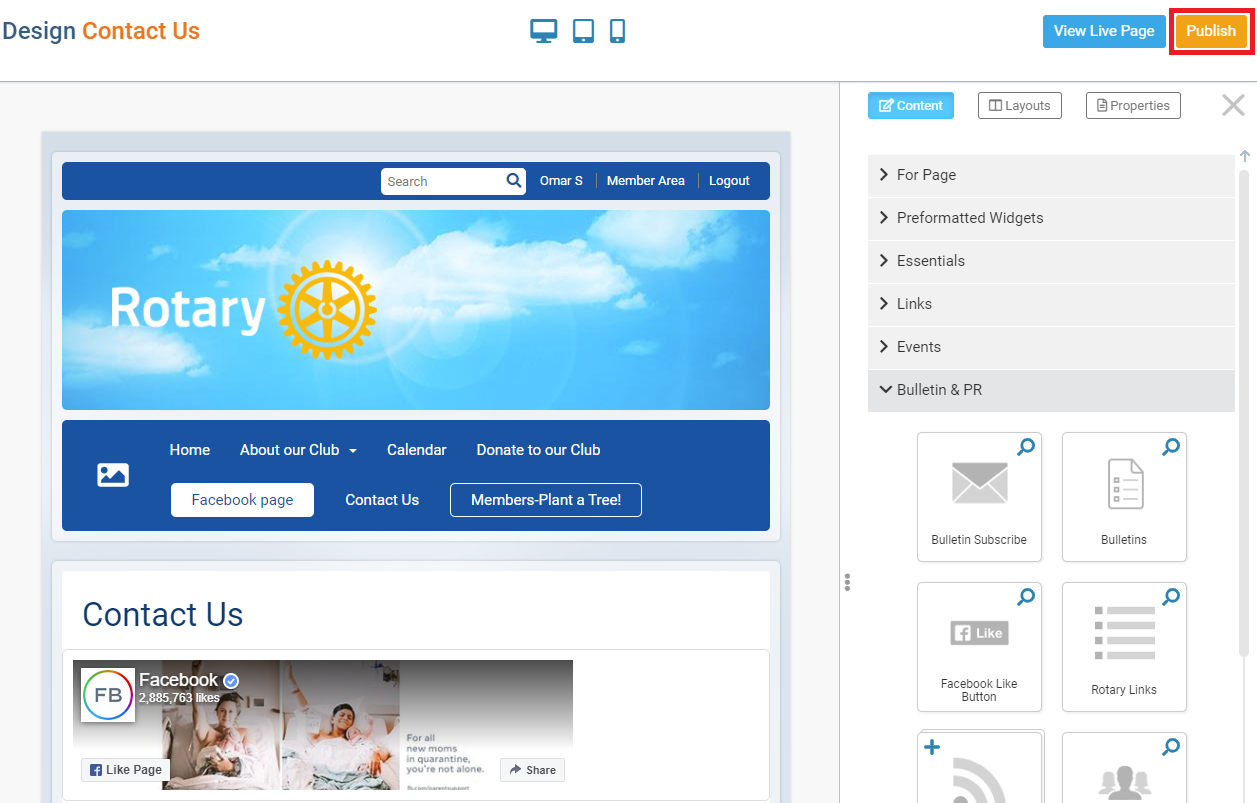
This will publish the page with the Facebook plugin so viewers and members can view, like and share the Club's Facebook page.
