The Bulletin Designer for ClubRunner gives you a convenient way create and customize your club bulletin. You can pick your theme, configure your layout and even add customized content throughout – and as always, no coding or special skills required. Just to make things even smoother, you won’t have to worry about converting over your existing content – we’ve already ported over all your Bulletin content to the new designer and selected a default layout and theme to get you started right away.
To access the bulletin editor, you must first log in to your club home page. Once you have done that click on the Member Area link near the top right of the page.


You will see a number of tabs running across the screen. Click on the Bulletin tab.

Now, click on the Manage Bulletins link.

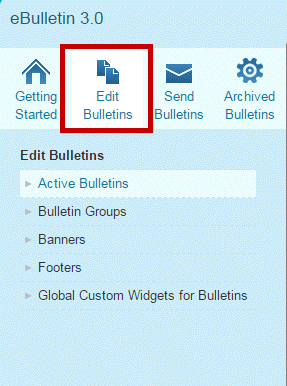
On the left side of the screen, you will see a number of bulletin options under the heading eBulletin 3.0. Click the Edit Bulletins link.
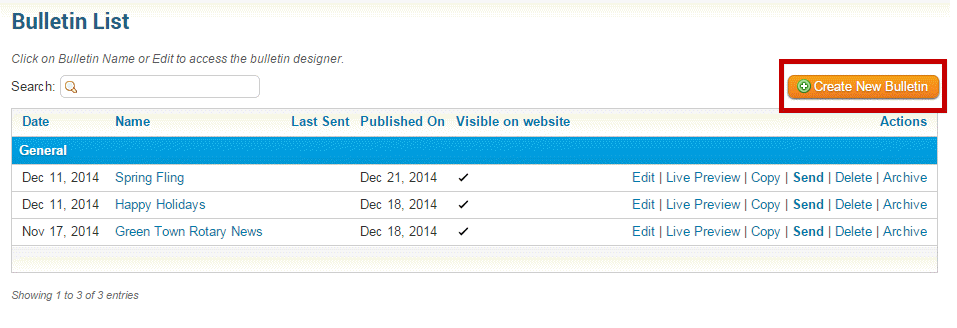
You are now on the Bulletin List screen. Here, you can view or edit existing bulletins, as well as create new ones.
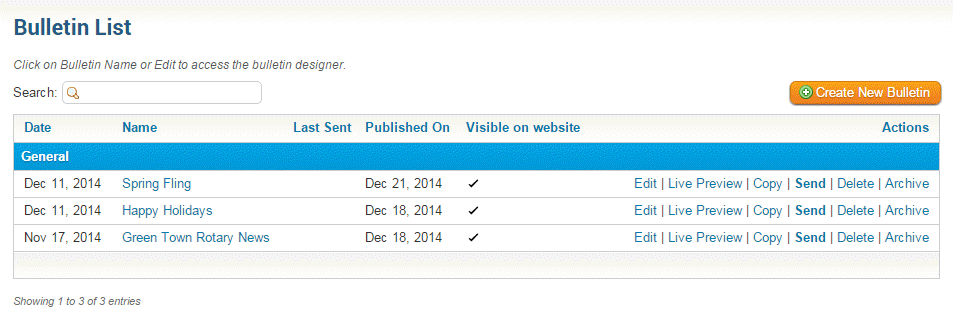
To start designing a new bulletin, click on the Create New Bulletin button.
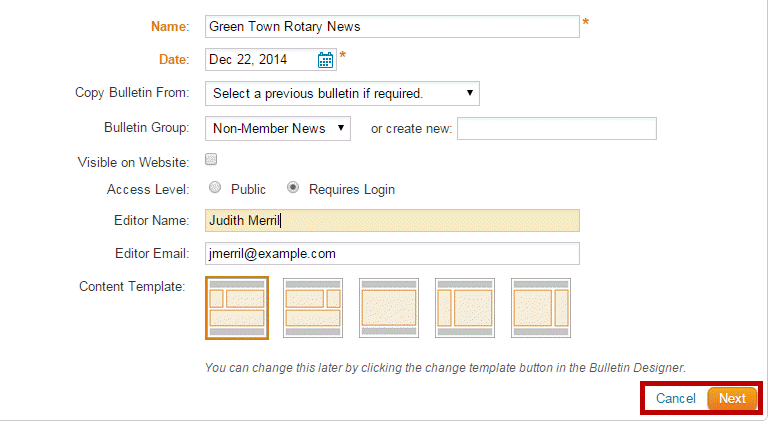
Next, you will need to enter the information and setting for your bulletin in the fields provided.
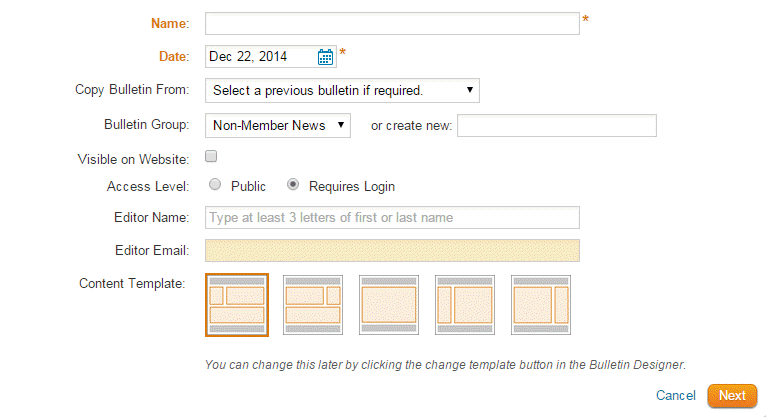
Fill in the fields with information as indicated below. When you are finished, click Save to keep the details, or Cancel to discard them.
- Name: Name of the Bulletin.
- Date: Use the Calendar Control to set a date for the Bulletin.
- Copy Bulletin From: This option allows you to reuse the information from a previous bulletin. The information setup from your selected bulletin will appear in your new bulletin. You can modify the new bulletin when copying.
- Bulletin Group or Create New: Allows you to assign the new bulletin to a currently existing group. If you require a new group, enter the name to the right of Create New.
- Visible on Website: Click this checkbox if you would like to display the Bulletin on your Home Page.
- Access Level: Determine if this Bulletin is available for the public or members only.
- Editor Name: Assigning the creator of the bulletin
- Editor Email: The email of the sender
- Content Template: Select the template you wish to use on your bulletin.
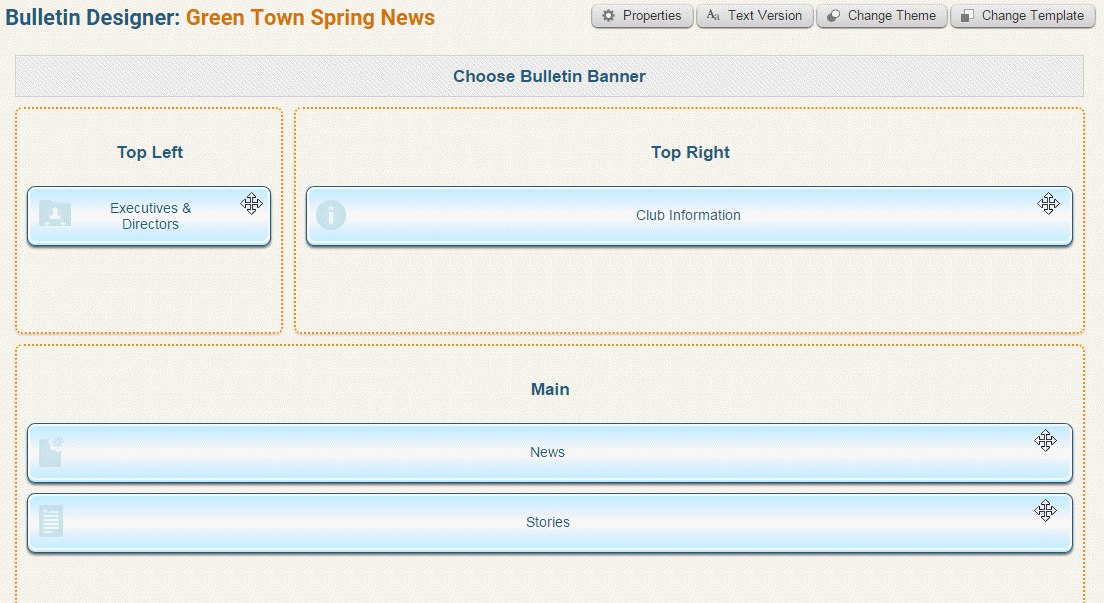
The bulletin designer lets you organize how your bulletin is going to be set up and what it will look like. Customize your Bulletin even more by choosing different themes, color schemes and properties using the following options:
- Properties: This button lets you change general information about your Bulletin such as name, group, editor, etc. set at the creation process.
- Text Version: You can create a plain text version of your bulletin for email clients that cannot render HTML emails. For more details on this option please visit our Plain Text Bulletin - Best Practices knowledge base article. Your link will open in a new window.
- Change Theme: Select any of the available themes to reflect your preferred style, including the colours, fonts and overall look and feel of your bulletin.
- Content Template: The Content Template button defines the Bulletin layout. These options were set at the creation process, however they can be changed at any time. There are 11 different layouts to choose from.

Adding Widgets
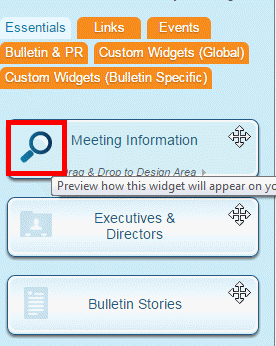
A Widget is an application, or a component of an interface, that enables a user to perform a function or access information. When editing a bulletin, the widgets are visible on the left side of the screen as a series of orange tabs.
Simply click on the orange tabs under the Website 3.0 heading to browse the widgets available.

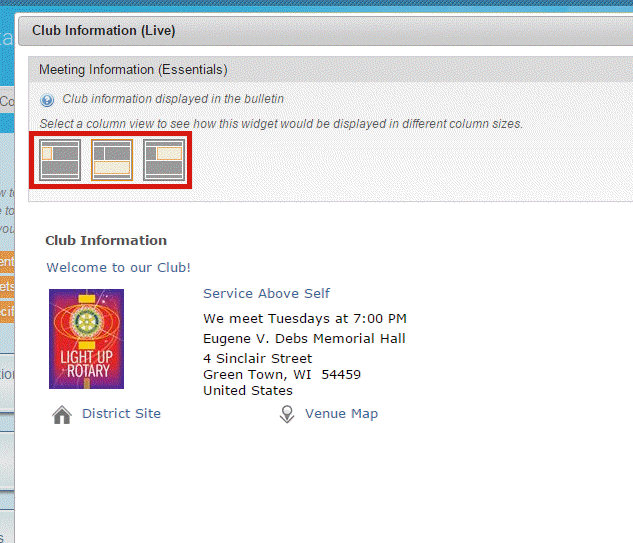
Once you have located a widget you wish to place, you can hover your mouse icon over the widget. A magnifying glass icon appears. Click on this icon to see a preview of the bulletin with the widget in place.
If you click on this icon, a preview of the bulletin with the widget in place appears in a pop-up window. You may click on the column view icons to see how the widget would display in bulletins of various column sizes.
You can click and hold your mouse button over the widget and drag it in to position. Release the mouse button to finalize the position and drop the widget. Depending on where you drop the widget it will resize to the width of the column.
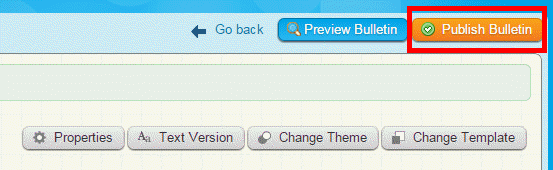
Once you have finished placing content in your bulletin, you may preview the result by clicking on the Preview Bulletin button at the top right.
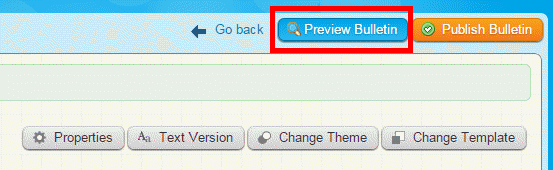
If you are satisfied with the layout of your bulletin, click the Publish Bulletin button.