Your site pages exist as subpages within your larger club or district homepage. As such, they can make use of their own internal navigation and page structure, such as a link menu. To create a site page menu you must access your Site Page Library.
To access the Site Page Library, log in to your ClubRunner home page.
Click on the Website tab.
Click on the Website Content link.
Click Pages on the left.
Click on Site Page Library.
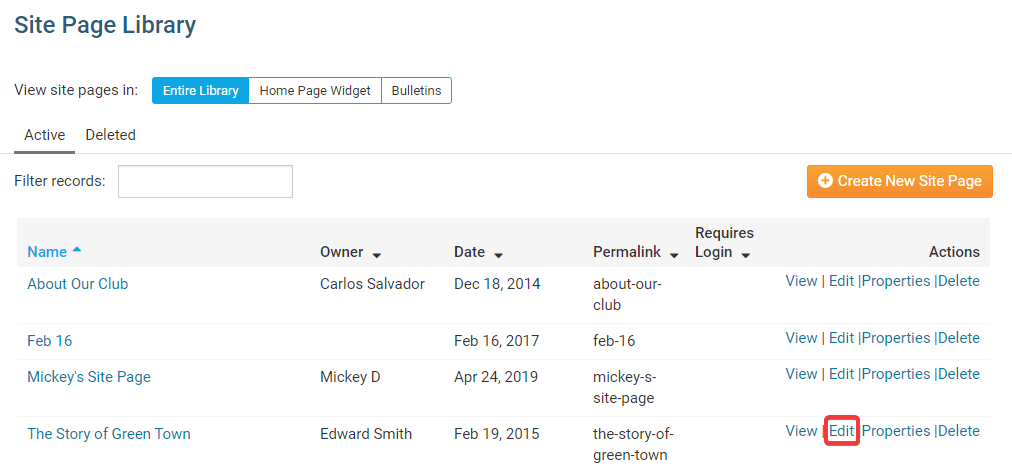
This brings you to the Site Page Library, a complete list of currently created site pages. Simply select the site page you wish to edit, and click the Edit link under the Actions heading.
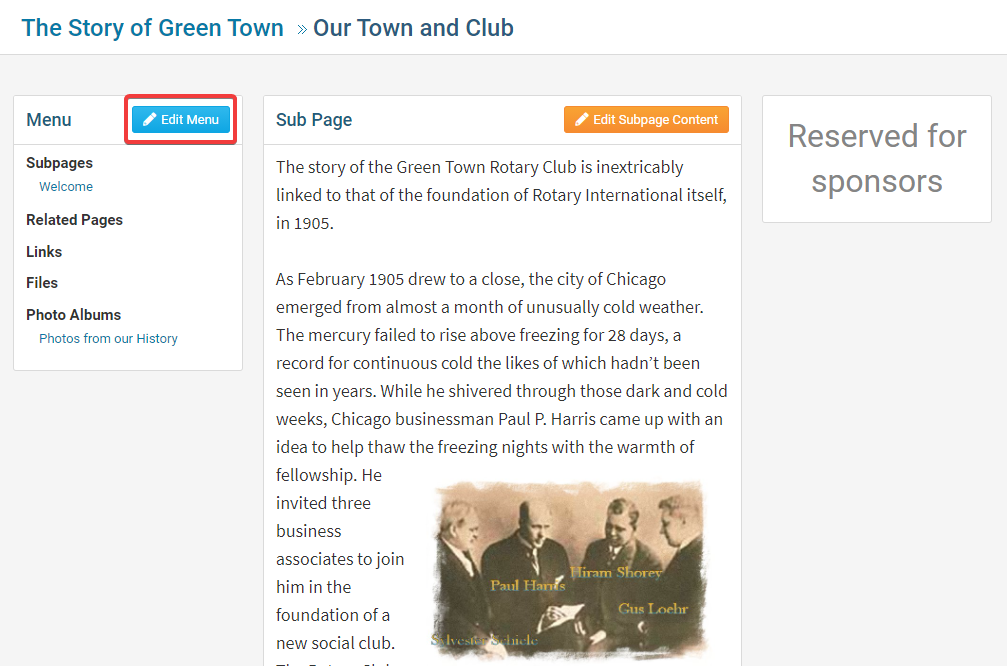
On the edit page, click Edit Menu.
This launches the Manage Links page, where you can add new links to your site page, as well as organize existing links. Links are organized into groups, such as Subpages, Related Pages, Files and Photo Albums.

Links are organized into groups, such as Subpages, Related Pages, Files and Photo Albums. You may re-order these groups by clicking on them and dragging them to the desired location.
Groups exist for the sake of convenience, to help you manage your menu links. You may create a new group by clicking the Add New Group button. You can remove a group by clicking Delete in the Actions column to the right of the group. If you don't intend to use a group, you may wish to remove it for purposes of clarity.
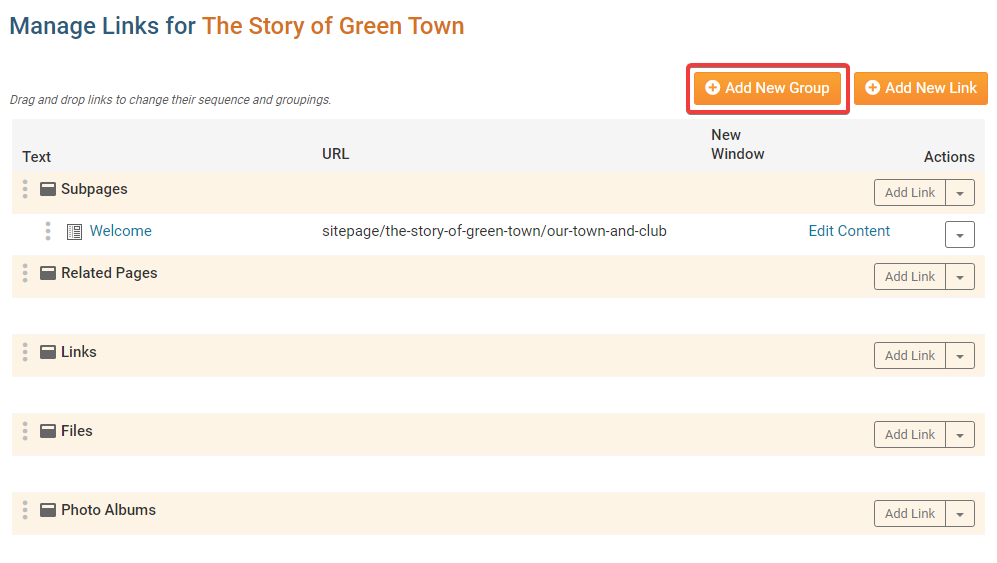
You may add a link in two ways. First, you can click the Add New Link button and assign the new link to the desired group. Or, you can directly add a link by clicking on Add Link in the Actions column to the right of the group.

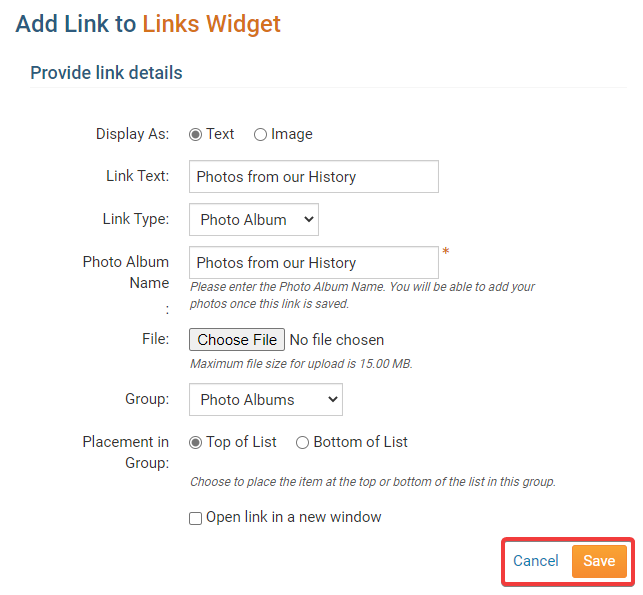
Regardless of which option you choose, you are taken to the Add Link to Links Widget interface. Here, you define the nature of the new sitepage menu link. First, you are asked whether you want to display the link as Text or an Image. Click the appropriate button. If you select image, the link will appear in the menu as a clickable image. If you choose to display the link as text, you will be asked to enter to that text in the Link Text field. If you choose an Image, you will be prompted to upload an image file.
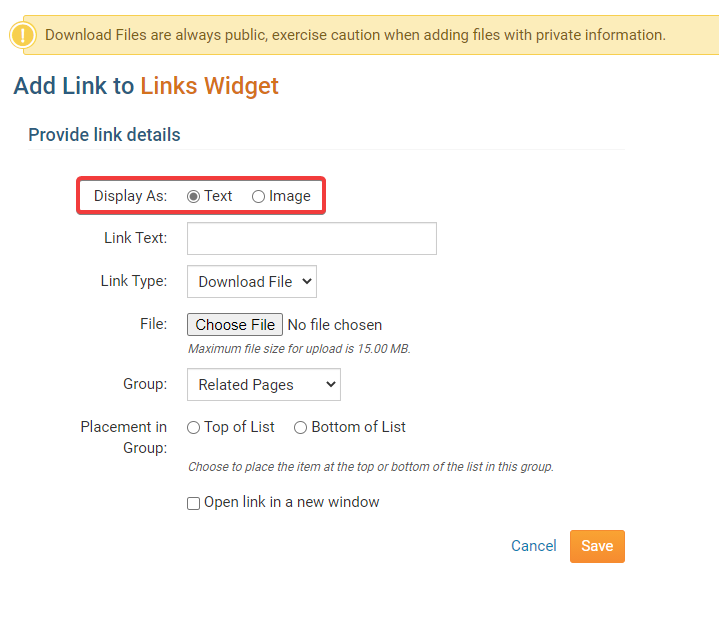
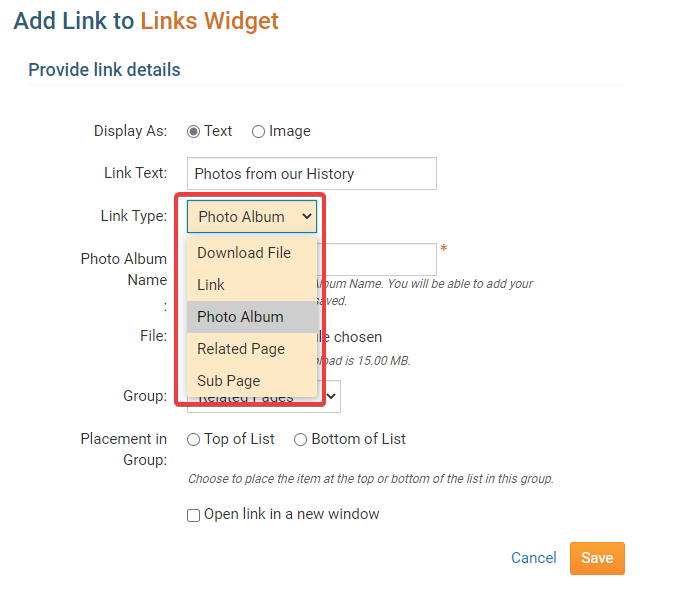
You are now asked to define the Link Type.
- Sub Page: These are distinct site pages with their own menu structure. You will be asked to name the sub page.
- Link: This is an external link to an existing page or email address. A text field will appear, where you can enter the URL or email.
- Download File: This links directly to a file for download. You will be prompted to upload a file with a maximum size of 10 MB.
- Photo Album: This brings the visitor to a club photo album. You asked to name the album, and will be taken to a photo upload page once the link is saved.
- Related Page: When you choose this option, you are asked to enter the name of the related page. Once the link is saved you are asked to add the contents of this page. You may also set an owner for a related page. The owner can be any member. They will be able to edit and change this page even if their access level would normally be insufficient for website designer access.
You must now decide to which group you wish to assign your link, or whether you wish to create a new group. Select these using the Group drop down menu,
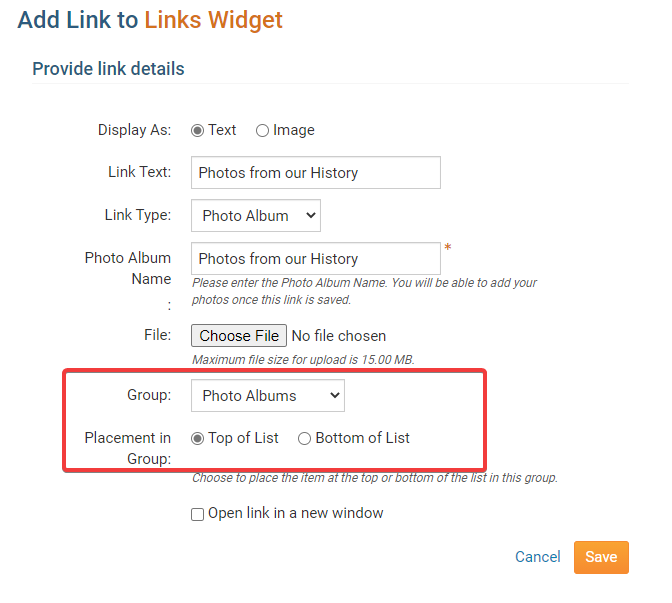
You can choose to associate the link with one of the existing groups, or create a new one, using the drop down menu that appears. Then, choose whether you want to place the link at the top or bottom of the group by clicking the appropriate option. If you wish the link to open in a new window, click Open Link in New Window.
Note: The Link Type and Group do not have to match. For example, you could place a Download File in the Photo Album group. The Group types are simply a suggested framework.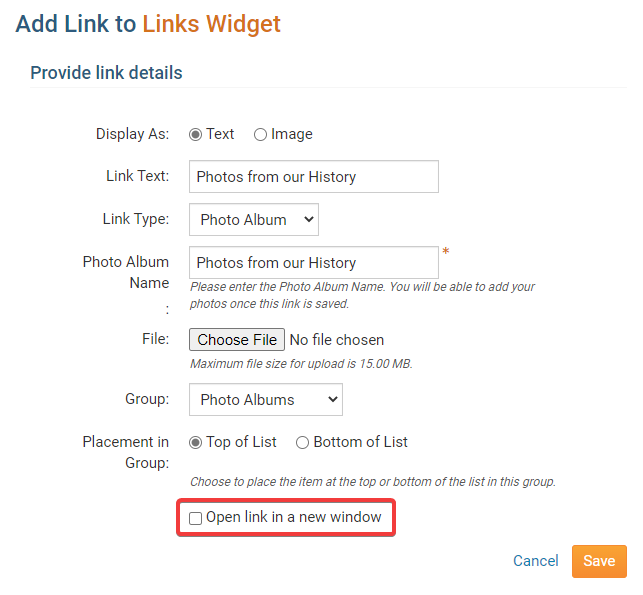
When you're finished, click Save to publish the link. Or, click Cancel to discard your changes. When you have finished, you are returned to the Manage Links page, where you can continue to edit your site page menu.