


Committees are an excellent way to organize the activities of your club. This support article will show you how to create a new committee.
You must have level 50 or better access in order to create a new committee.
-
To begin, log in to your account through your club homepage, then click on Member Area in the top right-hand corner. Alternatively, click here to go directly to the ClubRunner login page.
-
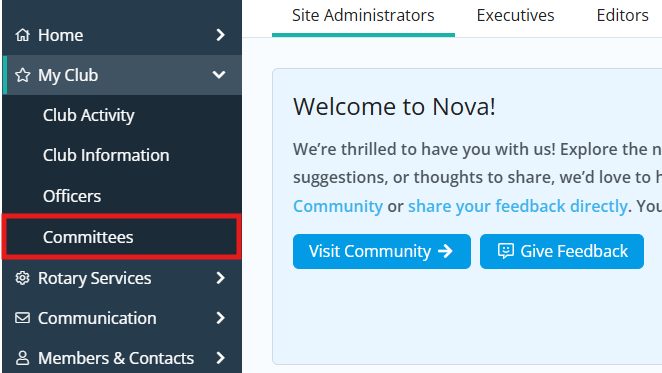
Click the arrow next to My Club in the left-hand navigation menu, then click Committees.
-
By default you will see the current yearly committees and may navigate to prior or upcoming years by clicking the back arrow << or forward arrow >>.

You may click the Committee Types drop-down menu in the top right-hand corner to view either yearly or standing committees.
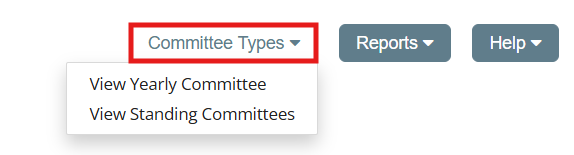
For more information on different types of committees, please read the support article: What types of committees can our club use?
-
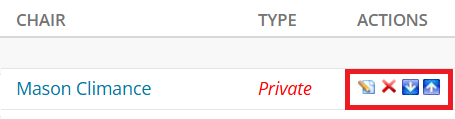
To edit, delete, or reorganize the existing list of Committees for each position, click these icons:
-
Pencil Icon: Edit the committee’s details.
-
X Icon: Delete the committee.
-
Up Arrow: Move the committee up one row within the director position.
-
Down Arrow: Move the committee down one row within the director position.
-
-
To create a new committee, click the Add New Committee button.

-
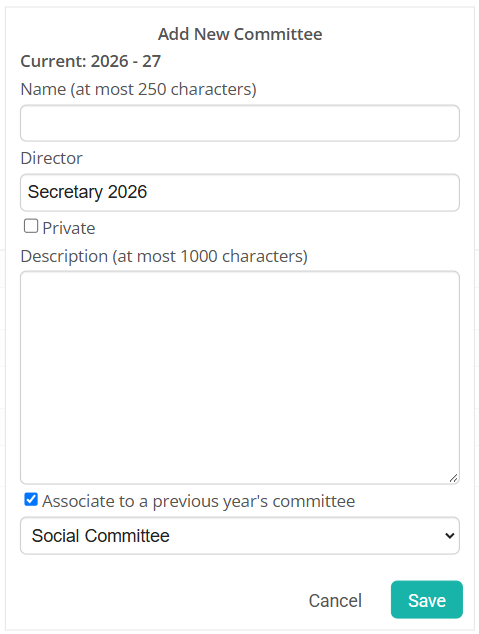
A pop-up box will appear, in which you may enter the details of the new committee. Enter the committee's title in the Name field, then click the Director drop-down menu to choose the club officer in charge of the committee. You may check the Private checkbox if the committee is not to be visible to the public, or to members not in the committee.
-
Enter the description of the committee in the Description textbox. You may check the Associate to a previous year’s committee checkbox to connect this committee to a prior yearly committee, then select the appropriate committee from the drop-down menu below.
-
Click Save to create the committee, or Cancel to discard it.