
Committees produce documents such as meeting minutes, event photos, and information brochures. Your Club committees can centralize these documents with ClubRunner.
To upload documents to a Committee using the Club version of ClubRunner, the Enhanced Committee Module is required.
NAVIGATION
Navigate to Committee Documents
To upload a document to a committee, navigate to your club’s home page and login. After logging in, click Member Area in the top-right of the home page.
Along the top of the Member Area, you will see a number of tabs. Click Organization.
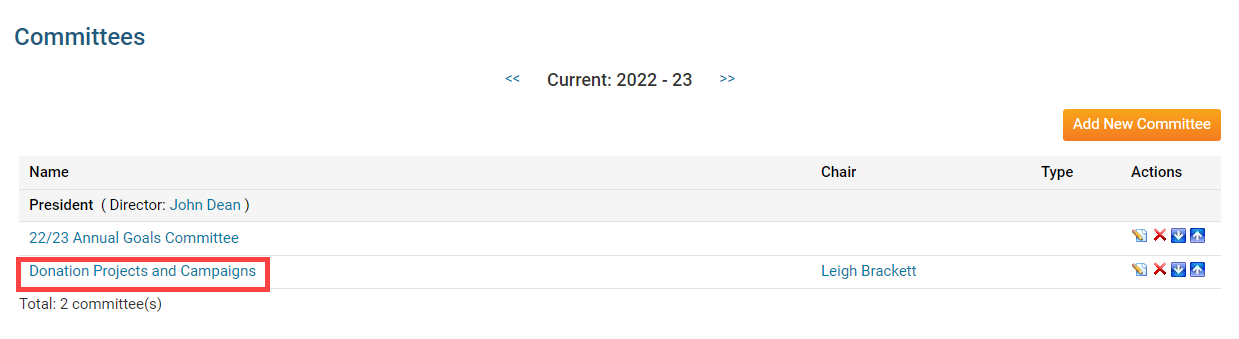
In the menu just below, click Committees.
Navigate to the Yearly or Standing Committee, then click the Committee’s Name.
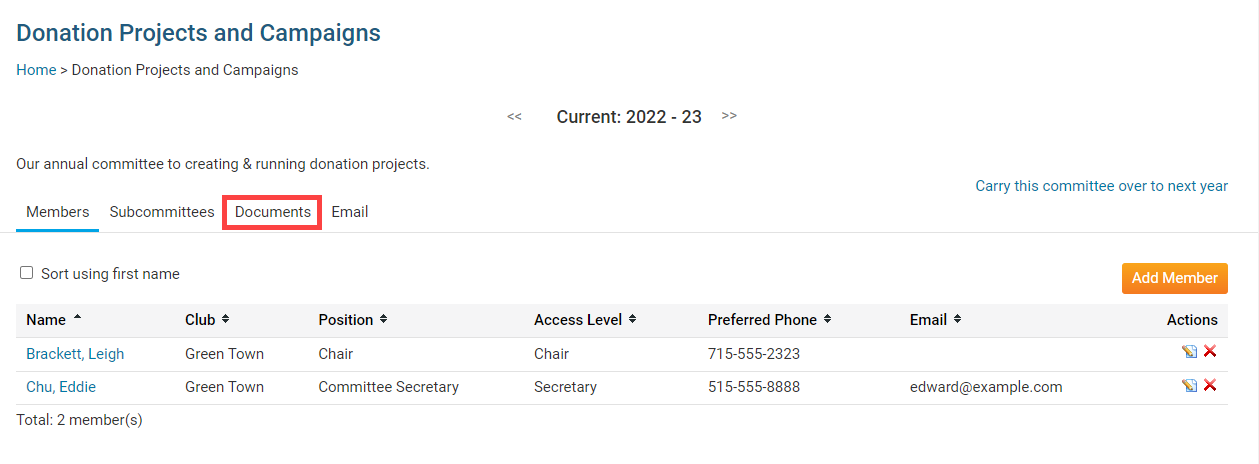
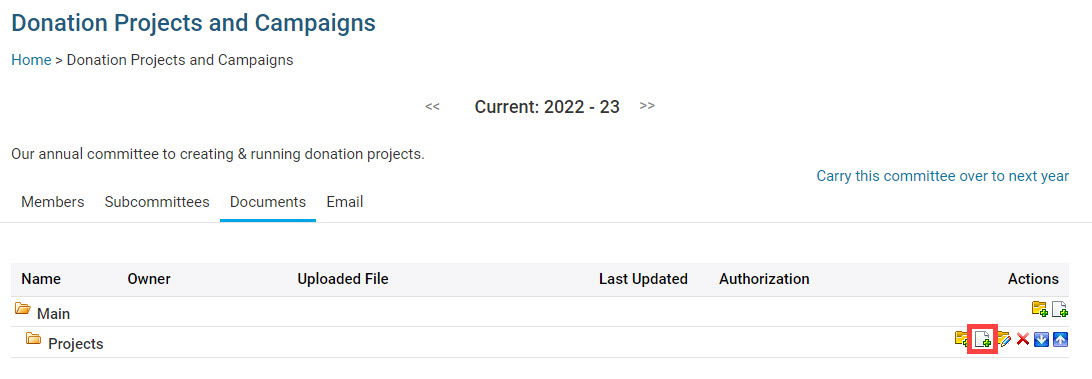
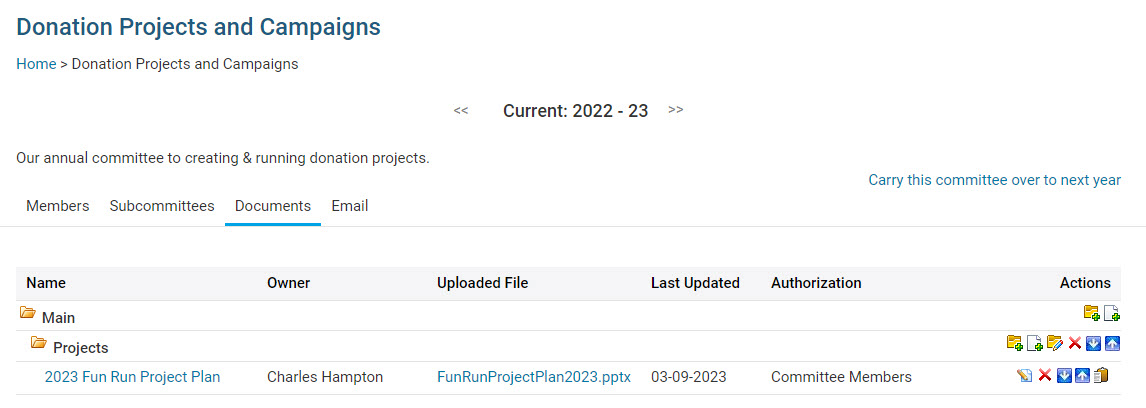
Click the Documents tab in the Committee.
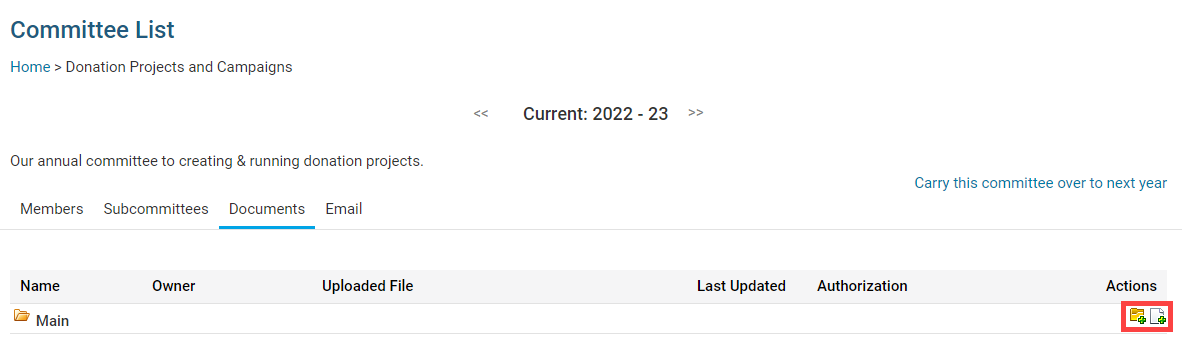
On the right-side of the page, you will have two options for the Main folder:
Folder Icon - Create a new folder for the Committee.
File Icon - Upload a Document to the Committee.
Create a Committee Document Subfolder
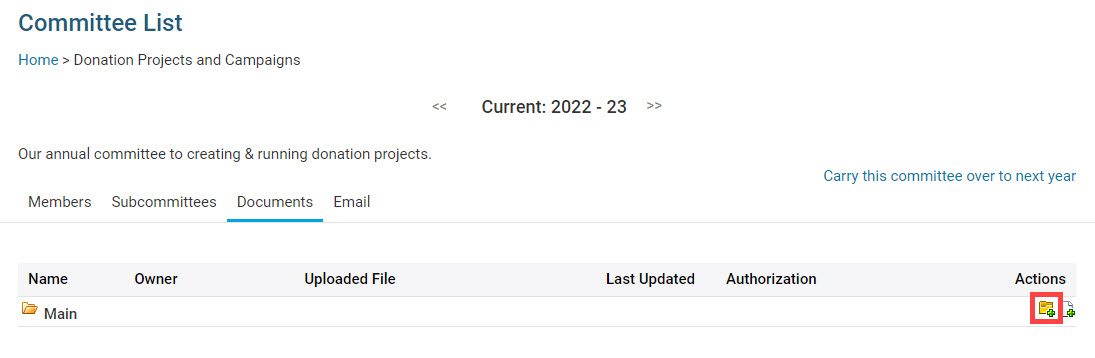
Click the Folder icon for the Main folder, or another folder, to create a nested subfolder.
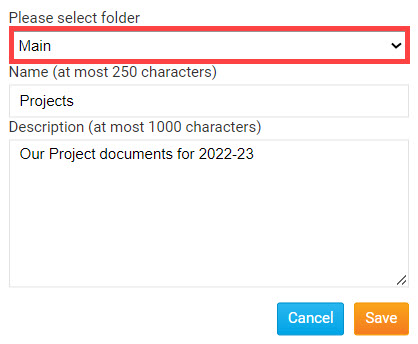
A popup will display to create the folder. Click the Please select folder dropdown to select the folder to create the new folder in. Otherwise, leave as Main to create the new folder in the Main documents folder.
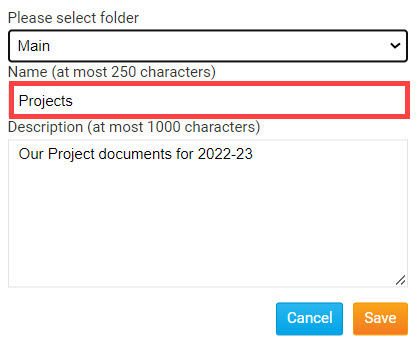
Enter a Name for the folder.
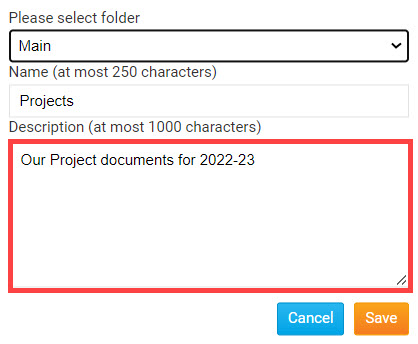
Enter a Description for the folder.
Click the Save button.

The folder will be saved to the Committee’s Documents List.
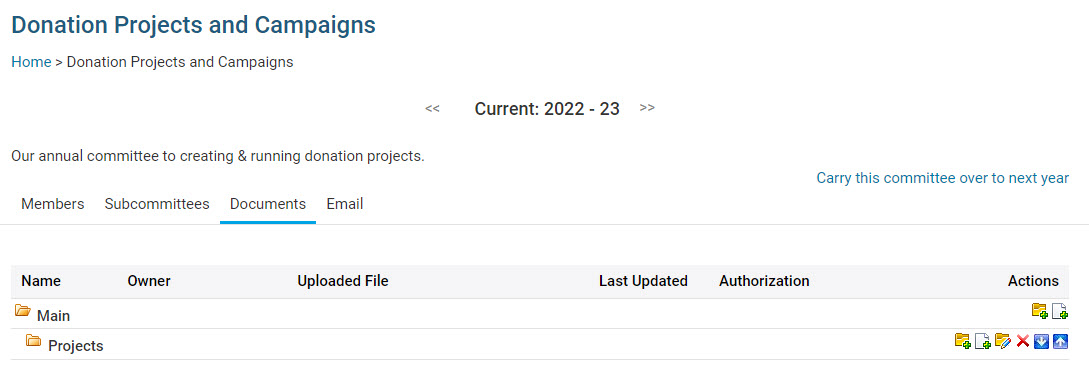
You will see these options for your new subfolder:
Folder Icon - Create a new subfolder, within the folder.
File Icon - Upload a Document to the folder.
Pencil Icon - Edit the folder’s details (Parent folder, Name, Description).
X Icon - Delete the folder. Note, all documents within the folder will also be deleted.
Down Arrow - Move the folder or document down the list.
Up Arrow - Move the folder or document up the list.
Upload a Document
Click the File icon to upload a document to the folder.
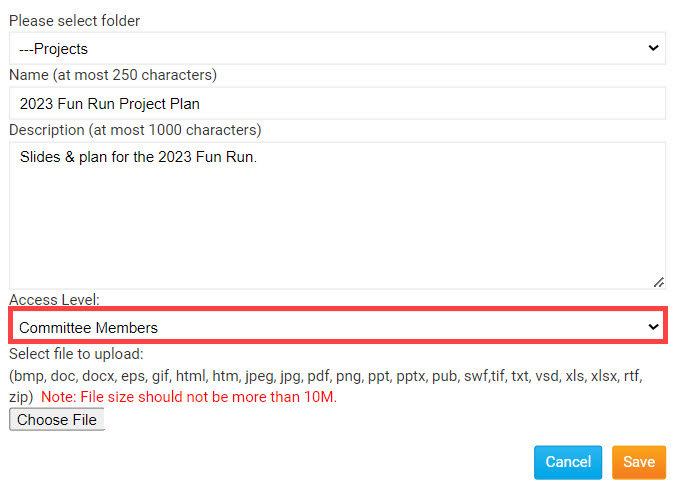
A popup will display to upload the file. Click the Please select folder dropdown to select the folder to upload the document into.
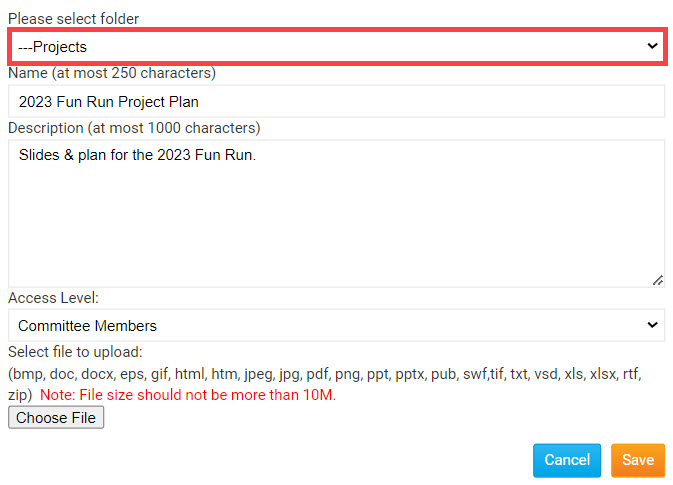
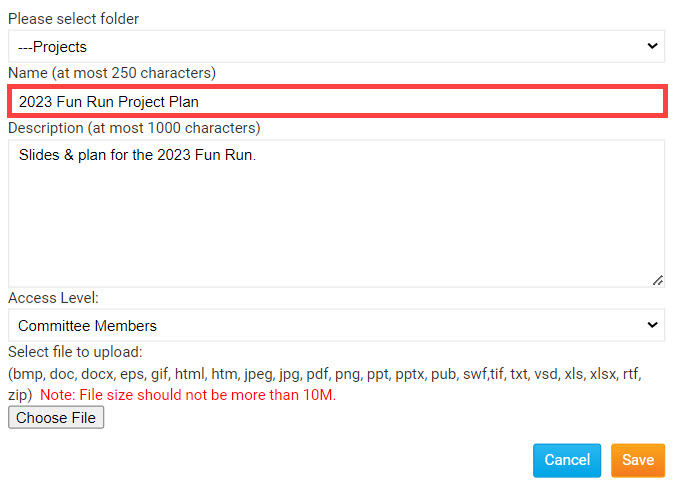
Enter a Name for the document.
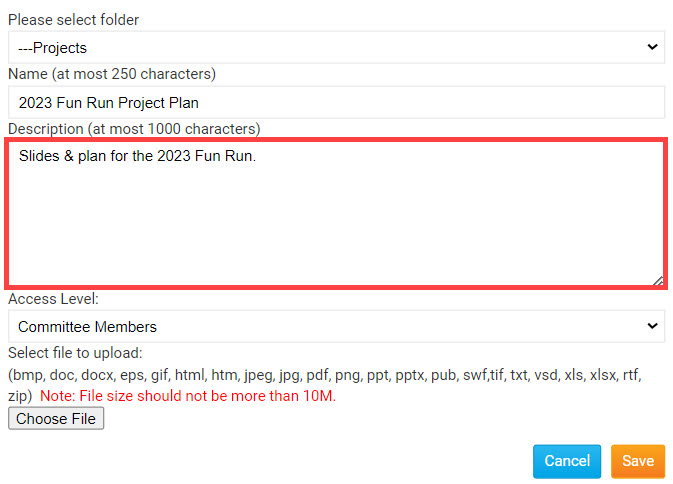
Enter a Description for the document.
Click the Access Level drop down to set who is able to access the document. You will have these options:
Committee Members - Only members within the Committee will be able to download and open the document.
Members - Any member of your organization can download and open the document.
Public - Any visitor or member can download and open the document.
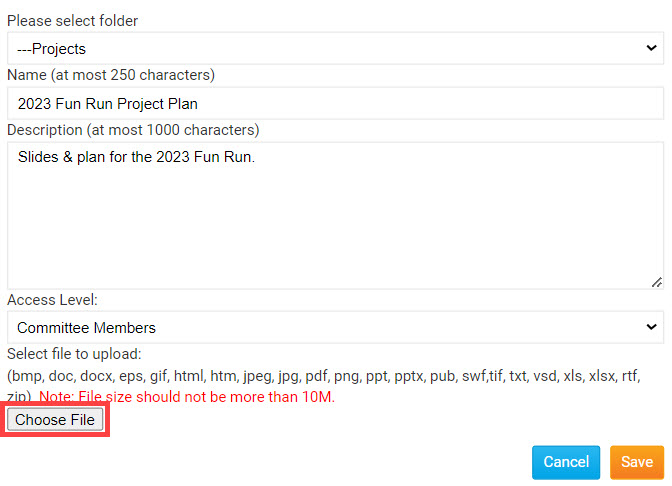
Click the Choose File button to select the document to upload.
The document can be no larger than 10 MB in size. The supported file types are bmp, doc, docx, eps, gif, html, htm, jpeg, jpg, pdf, png, ppt, pptx, pub, swf, tif, txt, vsd, xls, xlsx, rtf, and zip.
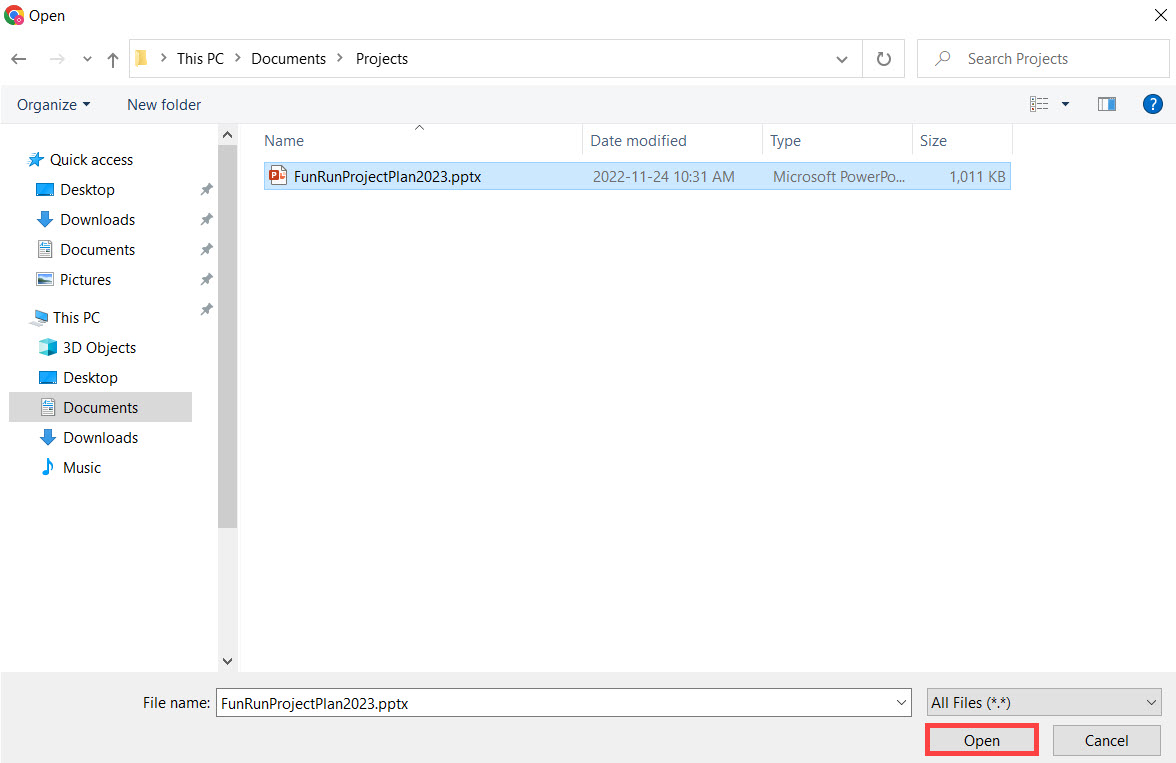
In your devices’ file explorer, navigate to the document, then click the document, and click Open in the popup to upload the document. You can also double-click the document to select it for upload.
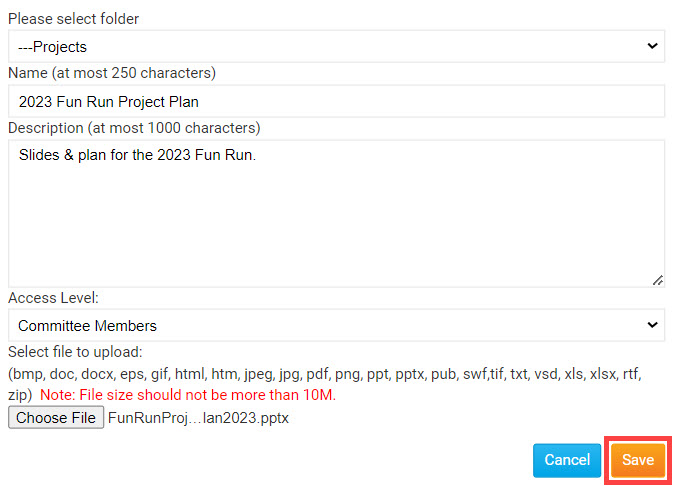
Click the Save button to save the document to the Committee.
The document has been uploaded to the folder selected. You will have these options to manage the document:
Pencil Icon - Edit the document’s details (Parent folder, Name, Description, Access Level, and File).
X Icon - Delete the document from the folder.
Down Arrow - Move the document down one row.
Up Arrow - Move the document up one row.
Clipboard Icon - Copy the URL or website address, to download the document.
Upload Multiple Documents
Click on the Multiple File icon to upload a filer to the folder.
A popup will display to upload the file. Click the Please select folder drop down to select the folder to upload the document into.
Click the Access Level drop down to set who is able to access the document. You will have these options:
Committee Members - Only members within the Committee will be able to download and open the document.
Members - Any member of your organization can download and open the document.
Public - Any visitor or member can download and open the document.
Click the Browse button to select the document to upload.
In your devices’ file explorer, navigate to the documents stored on your device. Select any of the files you wish to upload and click on the Open button.
Holding the CTRL key on your keyboard will allow you to select multiple files when you click on them.
Click the Save button to save the documents to the Committee.