Tables are used with text to help organize the content and make it more legible. These tables take the appearance of multiple text cells arranged in a grid. ClubRunner gives you the ability to place tables in the Online Editor for your organization's site.
-
To insert a table into a story or widget, you'll need to be logged into your ClubRunner site. Once there, open the story or widget you wish to edit.
-
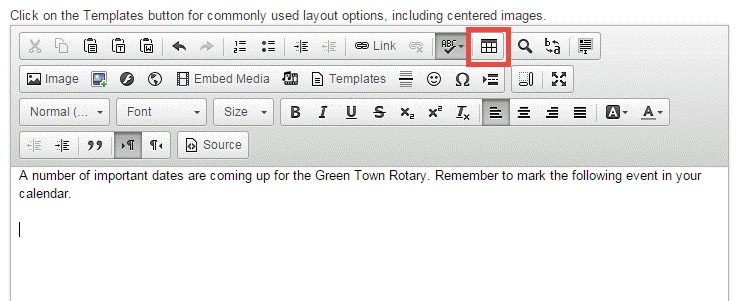
To add a template to the story, click the grid-shaped Tables button, as highlighted below on the tool bar.
-
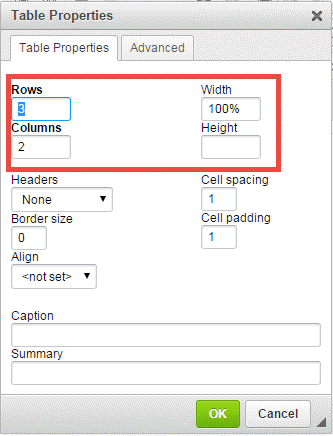
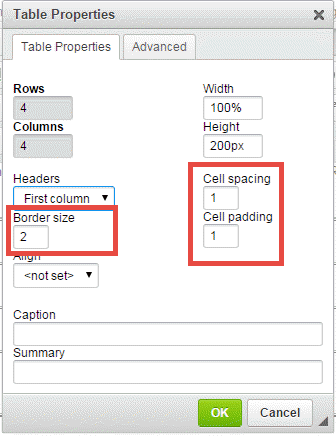
This launches a Table Properties window. Here, you may define the properties of the table as you wish it to appear.
- Row: This sets the number of horizontal rows or lines in the table.
- Columns: Use this field to enter the number of columns.
- Width: This field defines the pixels of screen width occupied by the table. You may also set this value in terms of a percentage of the field by using the "%" symbol after the value. Setting Width to 100% would create a table that spread across the entire editing screen.
- Height: Enter in pixels the height of each table row.
-
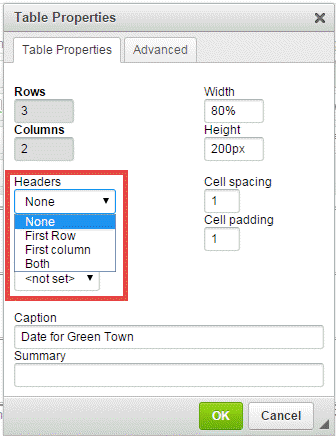
The Headers drop down menu allows you to define the appearance of some cells as headers. The text in header cells is automatically centered.
- None: The top rows will have the same dimensions as the rows beneath them.
- First Row: The first row of cells will be formatted as headers.
- First Column: The first column of cells will be formatted as headers.
- Both: The first row and column of cells are both formatted as headers.
-
The Border and Cell fields further define the appearance of the table.
- Border Size: Set in pixels the thickness of the border that surrounds the table.
- Cell Spacing: This value, in pixels, sets a space between each cell in the table.
- Cell Padding: In this field you can define the amount of space separating the cell borders from the content within.
-
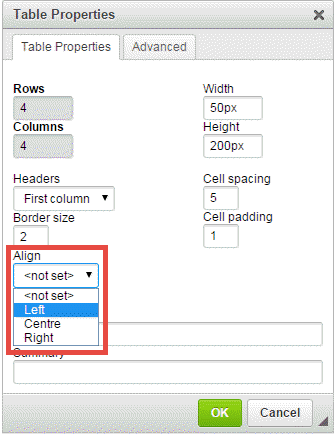
The Align drop down menu allows you to set the alignment of the table, either to the left, center, or right side of your story.
-
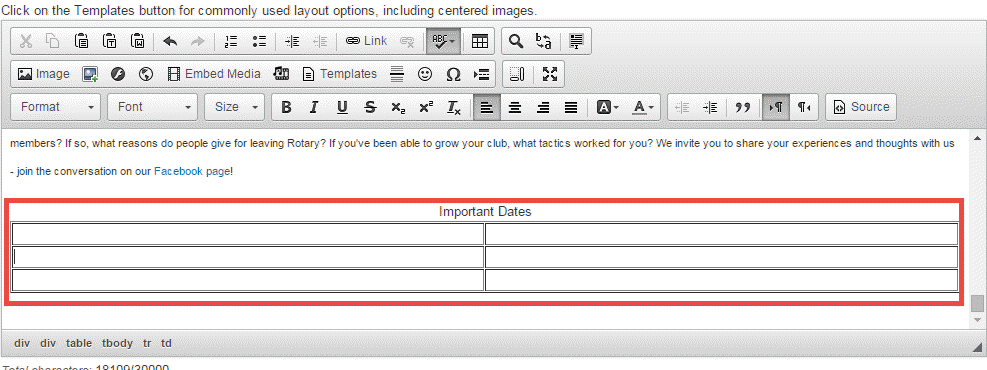
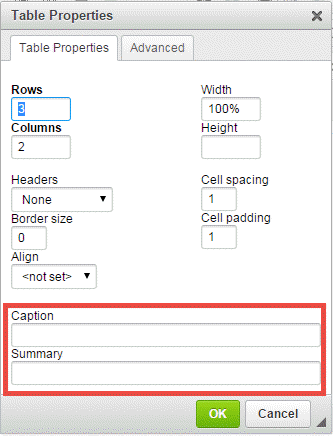
The Caption and Summary fields let you describe the purpose of the table.
- Caption: If you enter a caption, the text will appear above your table.
- Summary: This is an accessibility function for visually impaired users using screen readers. You can put in a brief description of the table contents.
-
When you're finished setting the table properties, click OK to save or click Cancel to discard the table.

-
Your table now appears within the Online Editor. You may now enter content in any of the cells.