You have the ability to customize your website's banner, and manage multiple banner configurations to make it easy to switch between them at various times. To create or update a banner, follow these steps:
1. Go to the website and login. Click on Member Area near the top right.
2. Click on the Website tab on the near menu bar near the top and then select Designer Home on the blue menu bar.
3. On the left hand side of the screen, click Banners.
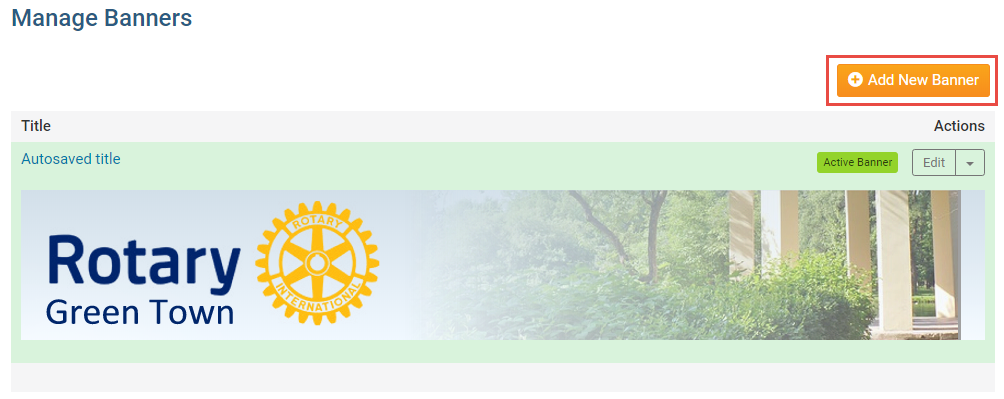
4. To create a new banner, click the Add New Banner button at the top right.
5. You are now on the Add New Banner screen.
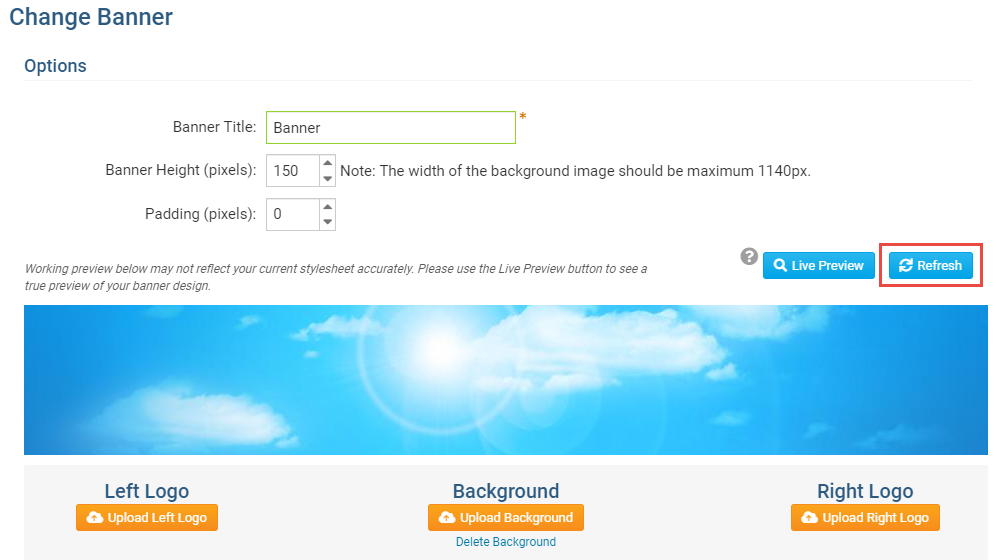
Banner Title: This is the internal name you will give the banner you are currently working on. This is simply a label and it will not be visible on the banner itself
Banner Height: This is the height of your banner in pixels. Recommended height is anywhere between 100 and 300 pixels.
Padding: This setting provides space between the banner contents and the banner border.
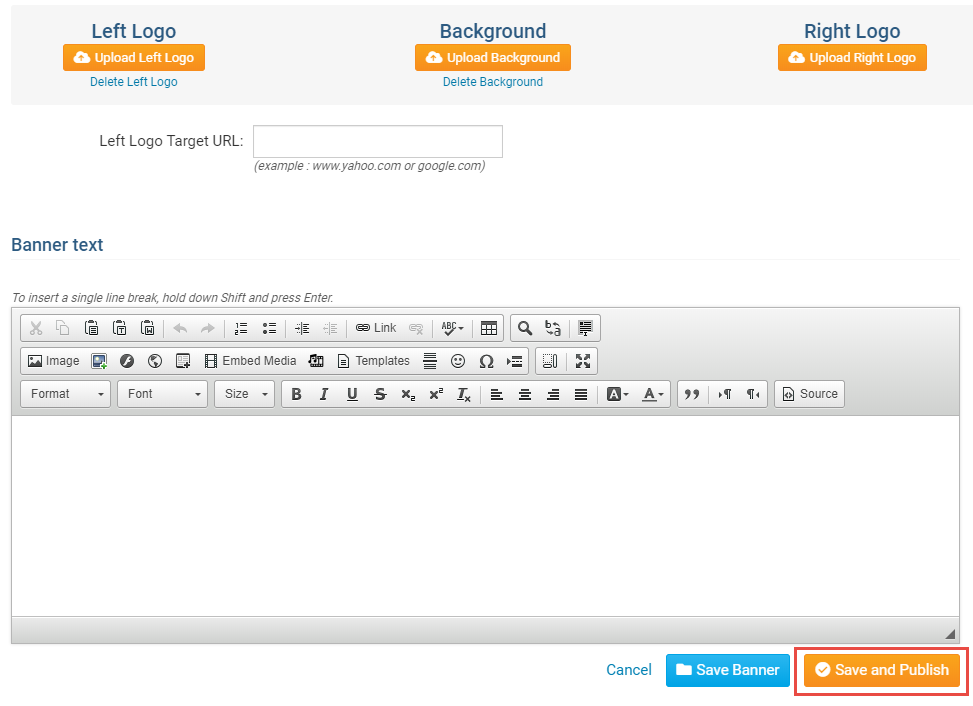
Banner Text: Here, you can enter the text that will appear on your banner. You can format this text using the icons in the editor, including increasing the font size and color.
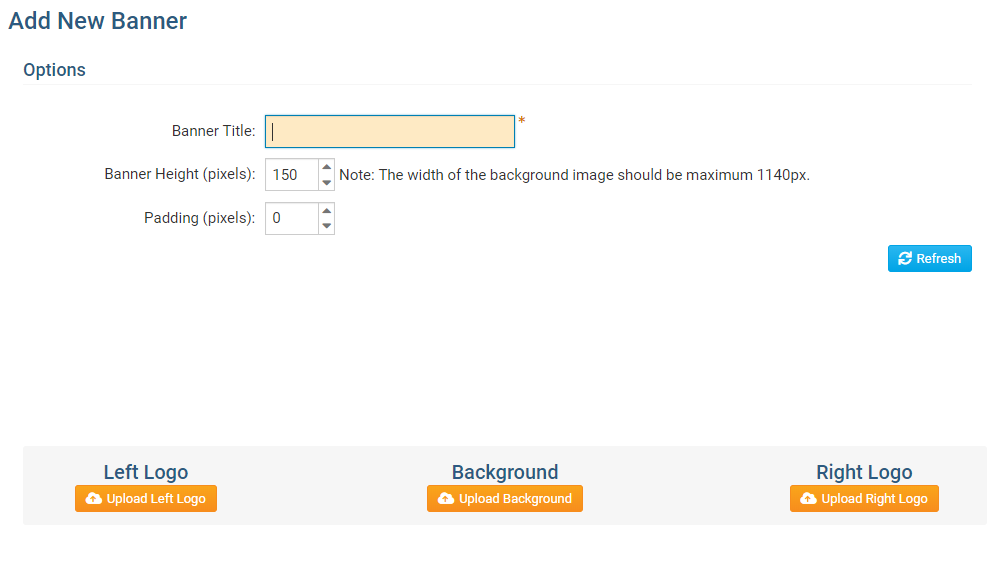
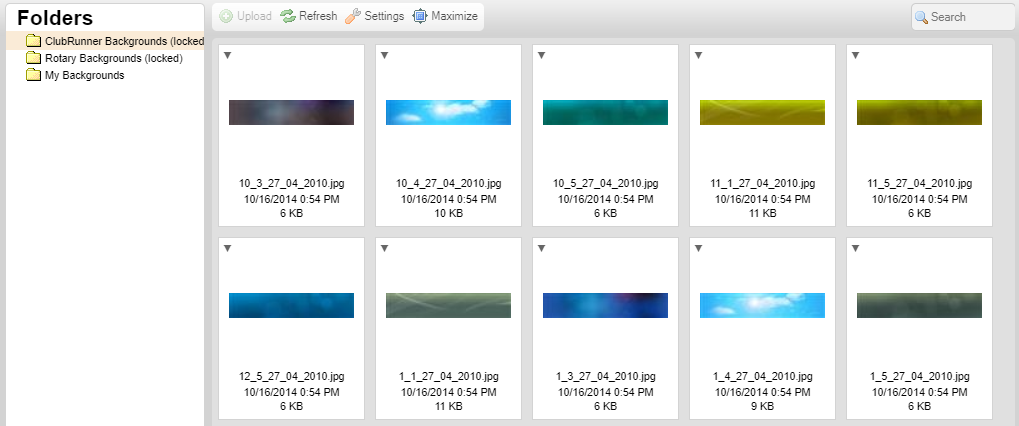
6. Click on Upload Background to set a background image for your banner. You have the option to select from a library of ClubRunner background images, or upload your own.

7. Clicking on the Left Logo or Right Logo buttons it will allow you to add images to the left or right side of your web-page banner. It is recommended you use transparent PNG files for these images.

8. The Refresh button displays your current banner setup. Click on it to preview your banner before saving.
9. Press the Save Banner button to save all your changes or press Save & Publish to save your banner and make it appear go live on the web-site.
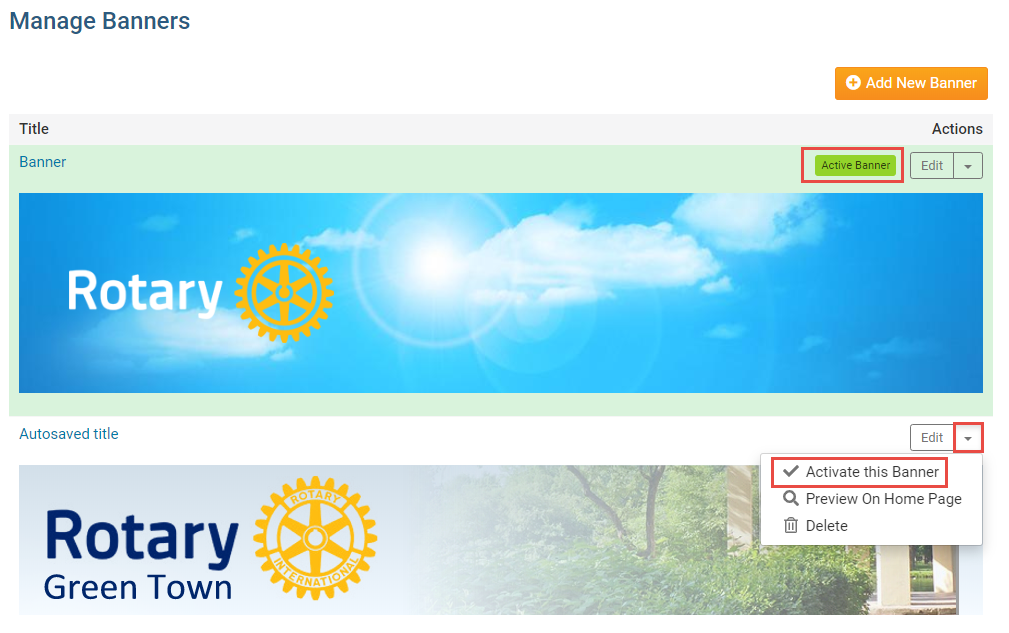
10. To switch between your saved banners, click on the Activate this Banner link to apply it to your home page. The selected banner will have the following message This is the currently active banner.