


Campaigns allow you to better promote your different initiatives and direct your donors to specific goals and causes. Each campaign is customizable with its own dedicated landing page, and allows full control of available donation tiers, campaign descriptions and imagery, confirmation messages, as well as progress tracking.
This support article will show you how to create a new donation campaign for your club.
To learn how to set up the built-in donations page, please read the support article: How do I set up and use the Donations page?
-
To begin, log in to your account through your club homepage, then click on Member Area in the top right-hand corner. Alternatively, click here to go directly to the ClubRunner login page.
-
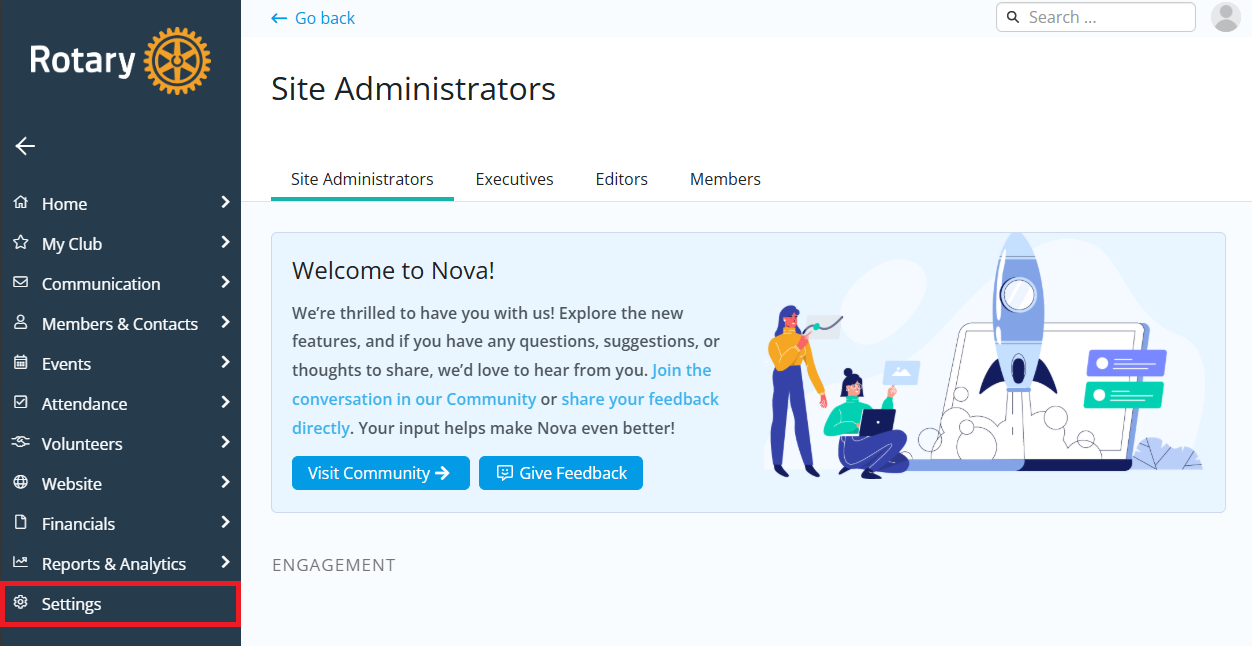
Once inside the members area, click Settings in the left-hand navigation menu.
-
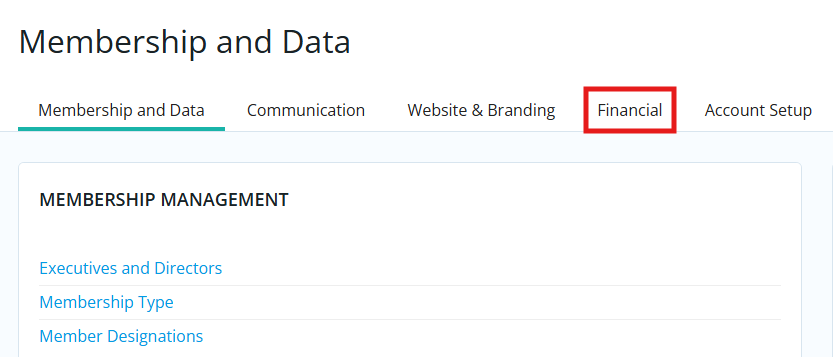
Click the Financial tab.
-
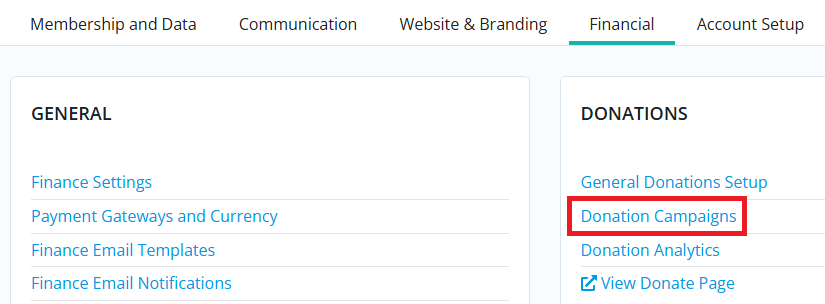
Click Donation Campaigns in the Donations section.
-
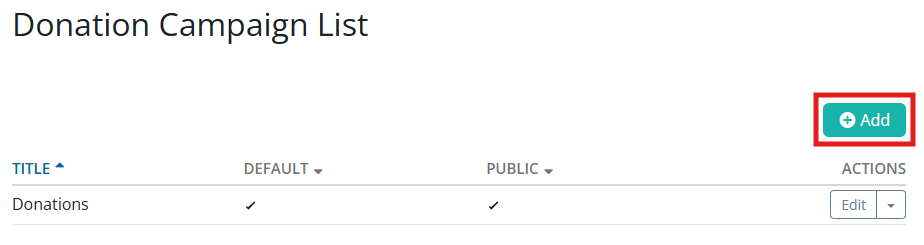
Click the Add button in the top right-hand corner.
-
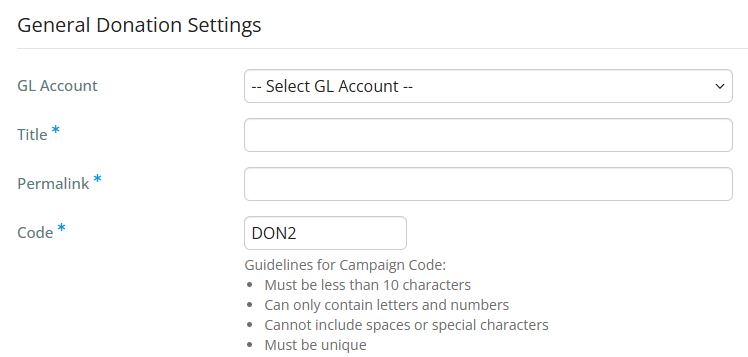
On the following page you will enter the information and settings for this new donation campaign. To begin, select the appropriate GL account for the donation campaign and enter a title for the campaign. The permalink will update based on the title but can be edited manually. You must then enter a short campaign code to help identify donation transactions at your payment processor.
-
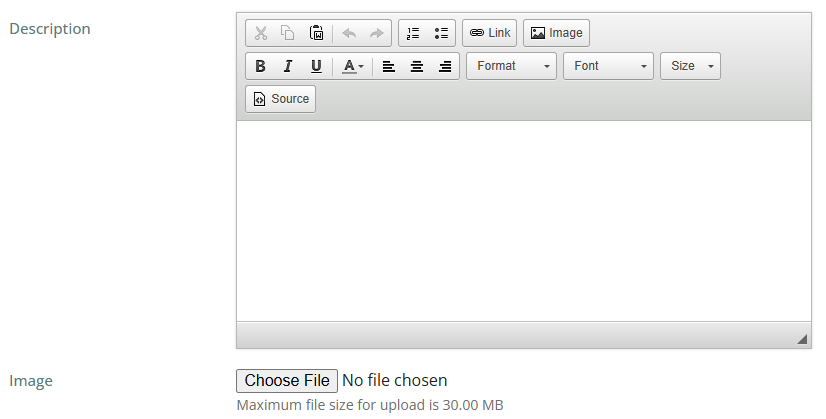
Next, enter a description of the donation campaign that will appear on its donation page. You may also upload an image from your device to help identify the campaign on the built-in donations page for your club site.
-
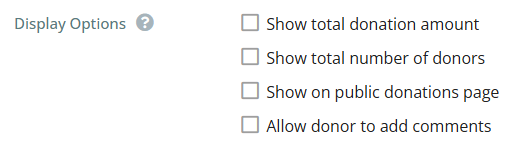
Toggle the appropriate checkboxes to manage the display options for this donation campaign.
-
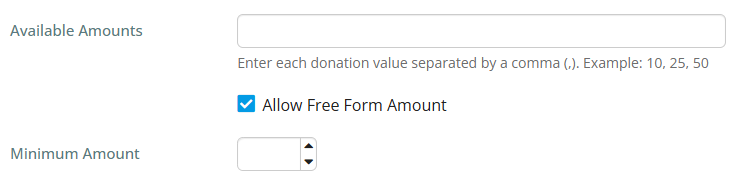
Next you will enter the available amounts that donors may select from on this campaign's donation page. Each option must be separated by a comma. You may also click the "Allow Free Form Amount" checkbox to allow donors to specify custom donation amounts, and may optionally enter a minimum value for the donation.
-
You will see options for invoice and payment settings, including the invoice due date and selecting the payment processor used (if your club has multiple payment processors). You also have the option to add a service fee for this donation campaign to help offset the cost of the payment processor, which can be based off of a percentage of the donation amount, a flat fee, or combination of both.

-
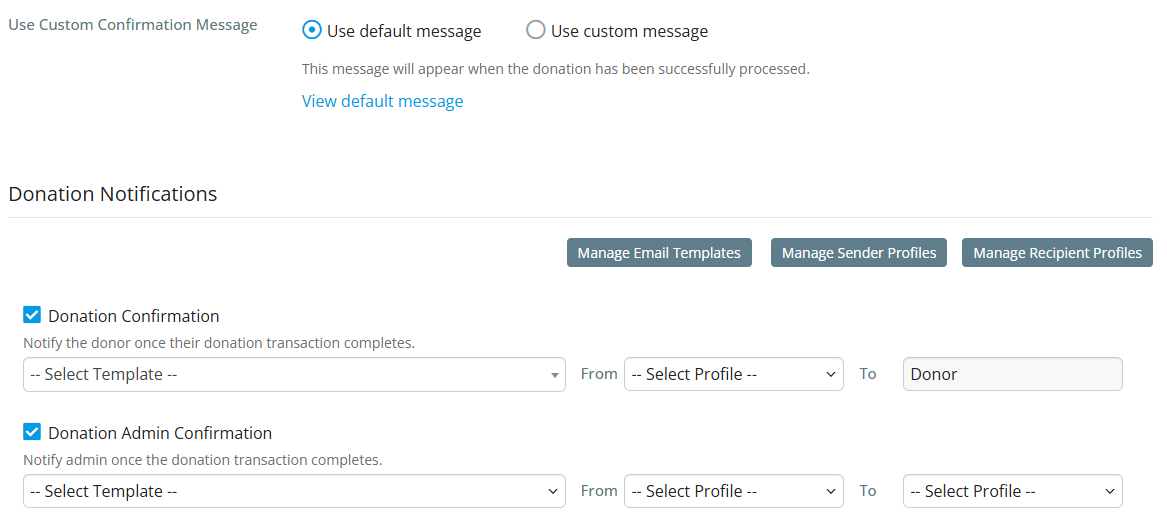
Lastly, you may set options for the confirmation message that appears after a donation is submitted and edit notification settings for this donation campaign. Select whether to use the default confirmation message, or click the "Use Custom Message" option to enter a specific message for the campaign. You may toggle whether to trigger email notifications to the donor or club staff, and select the appropriate template and sender/recipient profile.
-
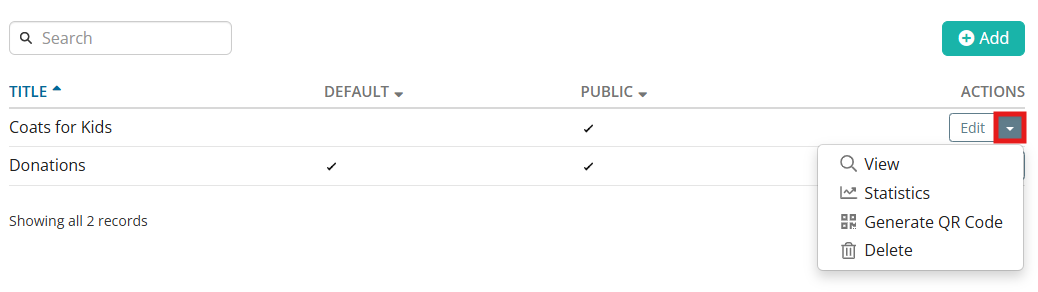
Click Save and your donation campaign will be created. You may make further changes by clicking the Edit button in the right-hand actions column of the Donation Campaign List page, or click the drop-down arrow to view other options including viewing the campaign page, viewing its statistics, generating a QR code for the campaign, or deleting the campaign.
Once your club has received donation submissions, you can add or edit campaigns and make other adjustments through your Donations dashboard. For more information, please read the support article: How do I view donation analytics?