ClubRunner has a built-in email feature that allows you to email fellow members and non-members. Their email addresses are stored in ClubRunner so you do not have to know them.
You can access the Email Message Center from your club's home page. Here you can compose emails and view the emails you have sent.
The Email Message Center does not act as an inbox. To view messages you have received, you must access your personal email.
There is an limit of 500 past emails that will appear in the Communication area.
-
To access Email Services, please log in to your club’s website, and click on Member Area at the top right corner of the home page. For more information on how to log in, please read the article called: How do I log in?
-
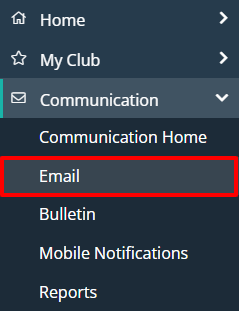
After you enter your login name and password it will return you back to the Club's homepage. Click Communication using the navigation menu on the left hand side, then click on Email.
-
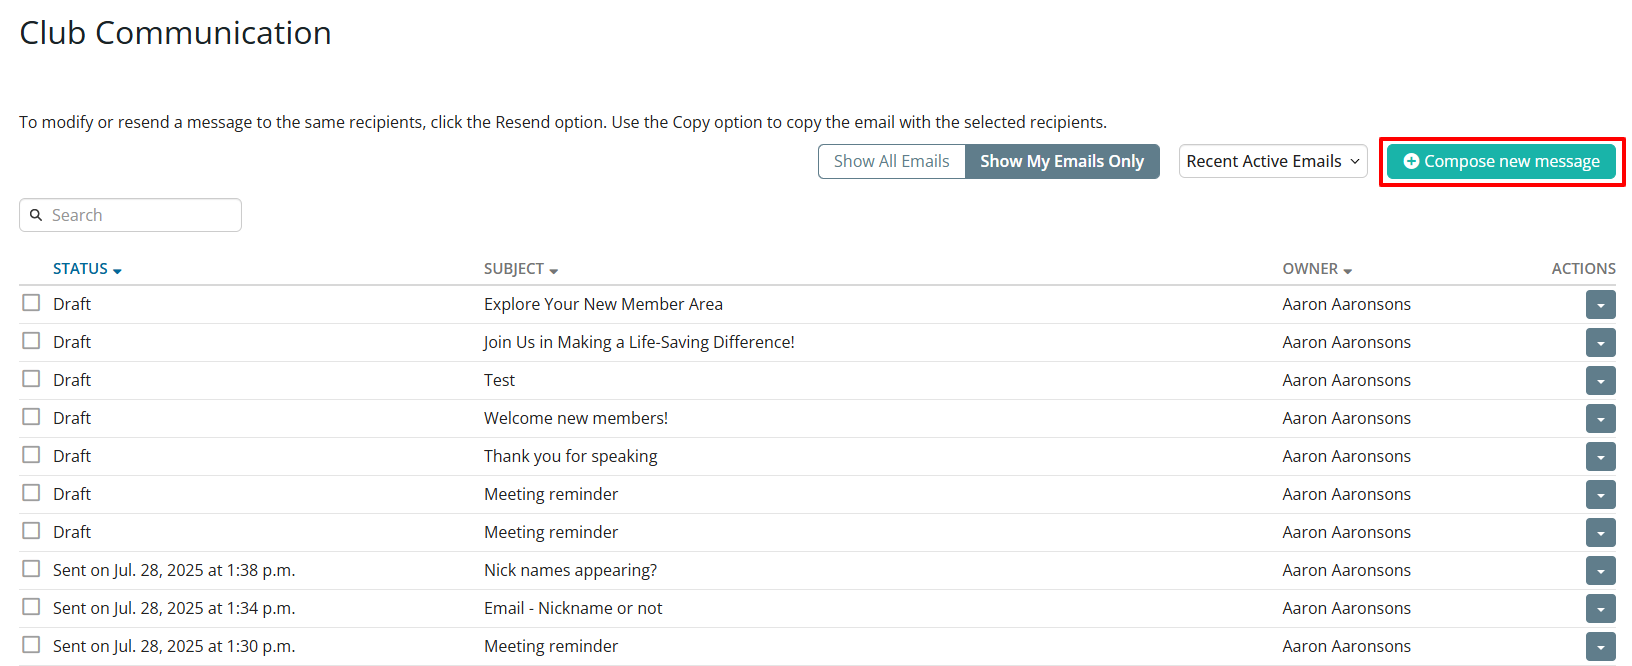
You are now on the Club Communication screen. Here, you can compose emails and view emails you may have sent.
-
Click on Compose new message as shown above. You will now be on the Create Email page, where you can compose a message to your fellow club members or non-member friends and contacts in the club database.

-
Now, write the subject of your email in the space provided.

-
Compose your message. You can use the toolbar buttons above the writing field to edit your fonts and text style, and to add images and links.

-
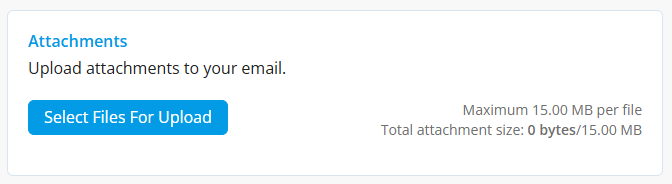
You now have the option to add a file attachment to the email. This could include photos or documents relevant to the email. To add a file, click Select Files for Upload. You can then choose files from your computer. The files cannot be larger than 15 MB in total.
 Note
NoteDid you know that you can use our built-in email AI assistant to help generate content for your emails?
For guidance on using the email AI assistant, refer to our help article: How do I generate content using the email AI assistant? -
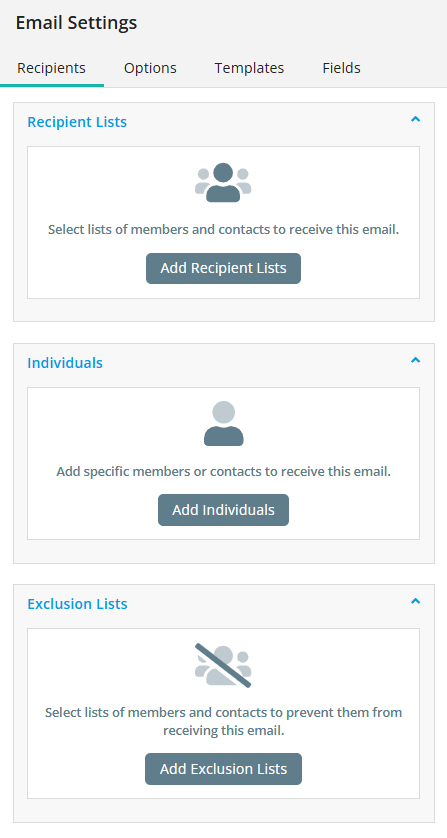
In the “Email Settings” area, there are four sections: Recipients, Options, Templates, and Fields.
The first step is to set who will receive the email by going to the Recipients section. The options available for you are the Smart Lists, Individuals, and Exclusion Lists.
-
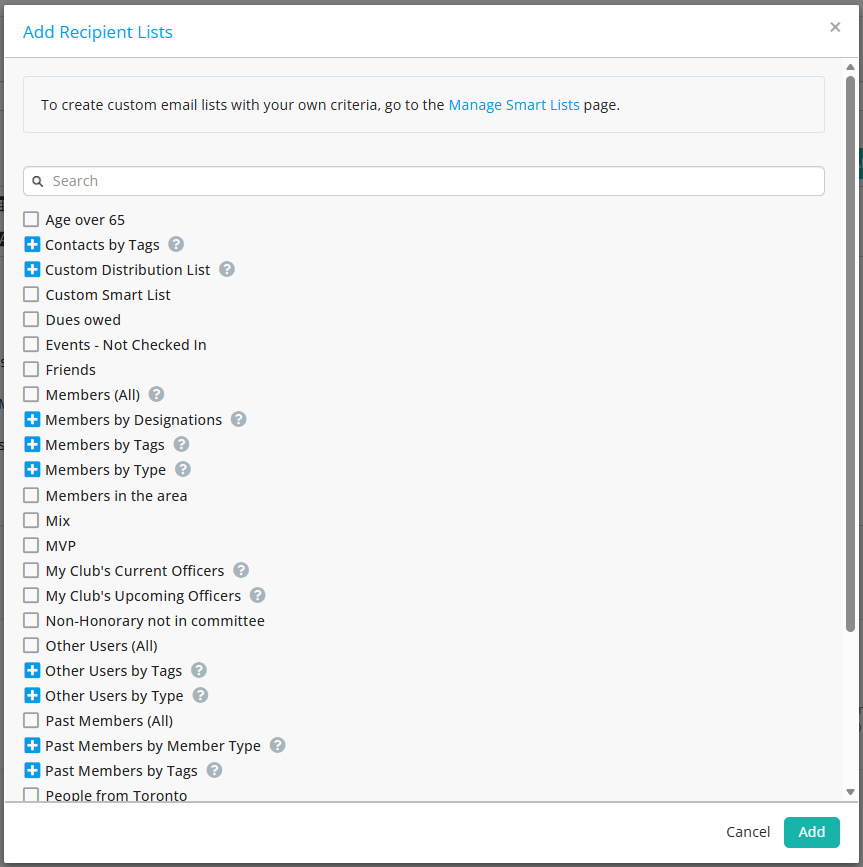
Smart List: Smart lists generate a list of recipients based on criteria when the email is sent. Once you’ve added a Smart List, you may click the Edit button to view and further edit the recipients in that list.
-
Individuals: You can also select individual recipients of emails instead of a whole list of members. You can search for a specific member’s name or email address in the Records field. You can also edit the Recipient field here as well.

-
Exclusions: This option allows you to use Smart Lists to generate lists of contacts that will be excluded from this email communication. You have the same options as using "Add Smart List(s)", but will be selecting members and contacts that will not be receiving your composed email.
-
-
The next step is the Options tab under "Email Settings". Under the Options tab, you have the following options:
-
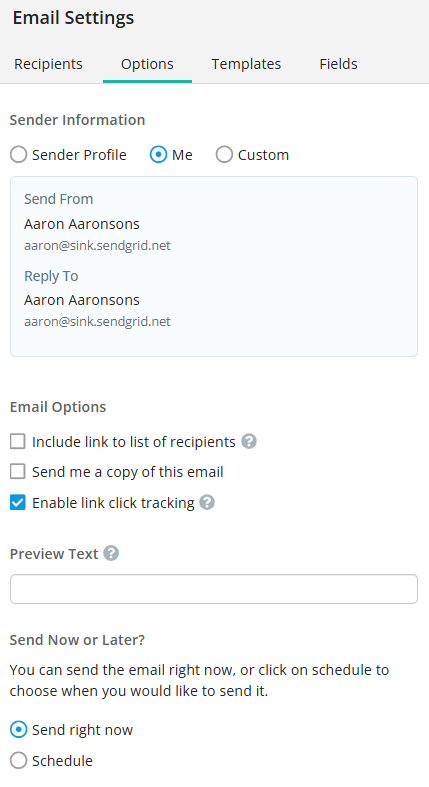
Sender Information:
-
Sender Profile: You can send an email to be sent out from a specific Sender profile in this stage. You can add custom Sender profiles using “Add Sender Profile” or edit a previously-created one using “Manage Profiles”.
-
Me: The email would show your first name and email as the Sender.
-
Custom: You can add a Name and Email for a Sender who you may not want to create a custom Sender Profile for.
-
-
Email Options:
-
Include link to list of recipients: A link to view the list of recipients will be included in the footer of the email.
-
Send me a copy of this email: When the email is sent, you will also receive a copy of the sent email.
-
Enable link tracking: When enabled, the total number each link is clicked will be recorded. This will be viewable on the email statistics page.
-
-
Preview Text: Text snippet that may be displayed in the recipient's inbox after the subject line.
-
Send Now or Later: You can send the email right now, or click on schedule to choose when you would like to send it.
-
-
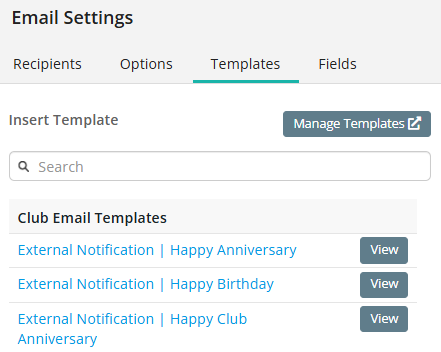
Next is Templates, which you can use to insert any previously created email templates into the body of the email.
-
Lastly you can use the Fields section to add dynamic fields that populate in your email.
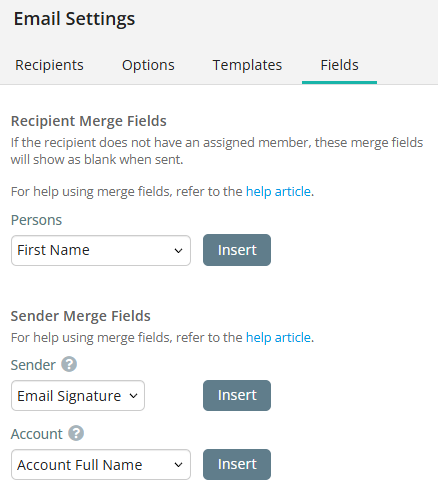
As an example, using the Fields section, select "First Name" from the Persons dropdown and click the Insert button at the appropriate point in your email. This adds a piece of code, which tells ClubRunner to insert the member’s first name from your club database when the email is sent. The person who receives your email will see their name, not the code.
-
Once all the fields in the email have been set, you will see the Send button go from grey to blue. You’ll then be able to send the email by clicking that button. There are 5 fields that need to be filled in order for the email to be sent:
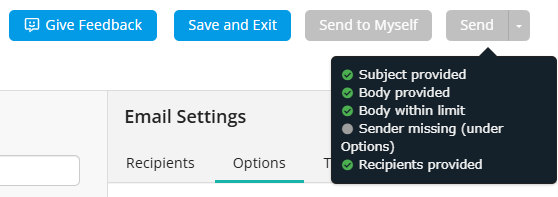
-
Subject provided?
-
Body provided?
-
Body within limit (Meaning character limit)?
-
Sender field
-
Recipients provided
-
If any of the fields above are not completed, you’ll see a message similar to the above. It will clearly indicate to you what fields are missing in the email and are required. In the case above, we haven’t selected a Sender Profile.
-
-
Once you select Send, a window will appear with final instructions confirming the subject line, as well as providing an email summary so you can review the email before sending it.
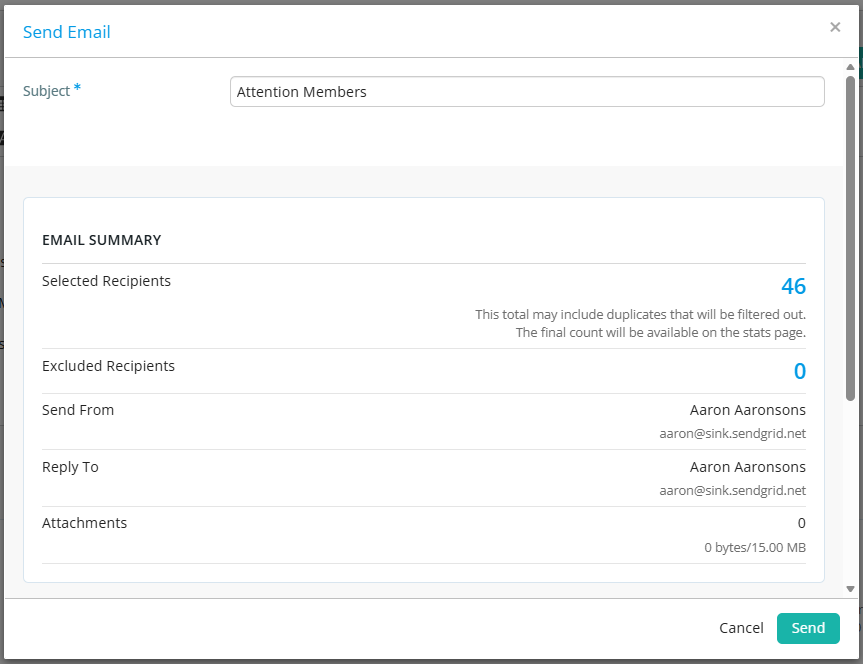
-
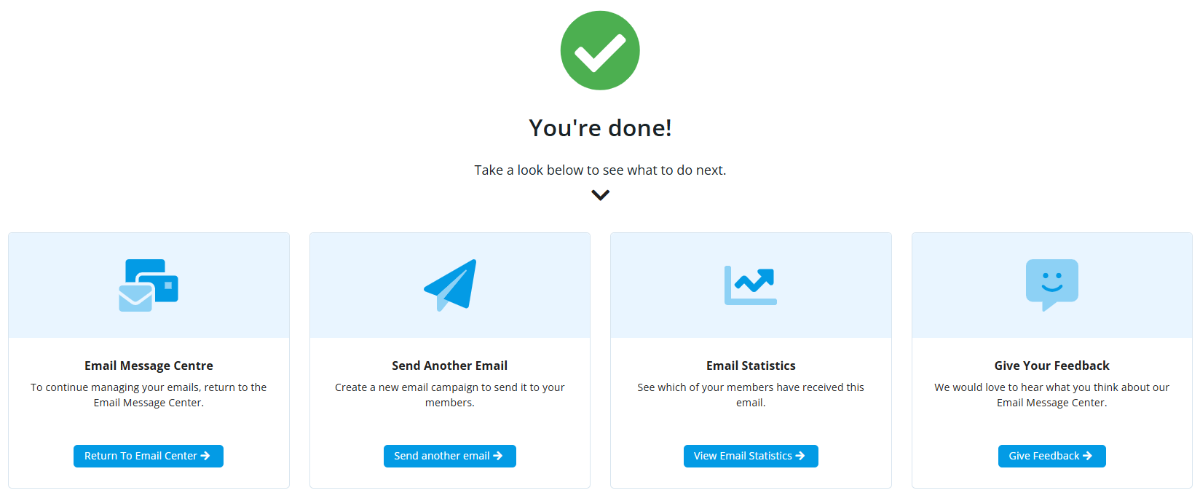
After clicking Send to finalize sending the email, you will be taken to a “You’re Done!” screen, which is the confirmation the email was sent successfully.