Cloud Events created within ClubRunner can be displayed on the website, sent by email, and shared on social media. Both members and non-members can register for events depending on the settings applied.
-
Log in to your account through your club homepage, then click on Member Area on the top right under your club banner. Alternatively, click here to go directly to the ClubRunner login page.
-
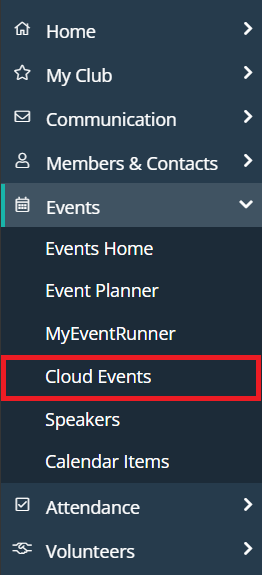
Once logged in, click on Events in the left-hand side menu and select Cloud Events.
-
Here you will see a list of all your current Cloud Events. To create a new event, click the Create Event button on the right-hand side of the page.
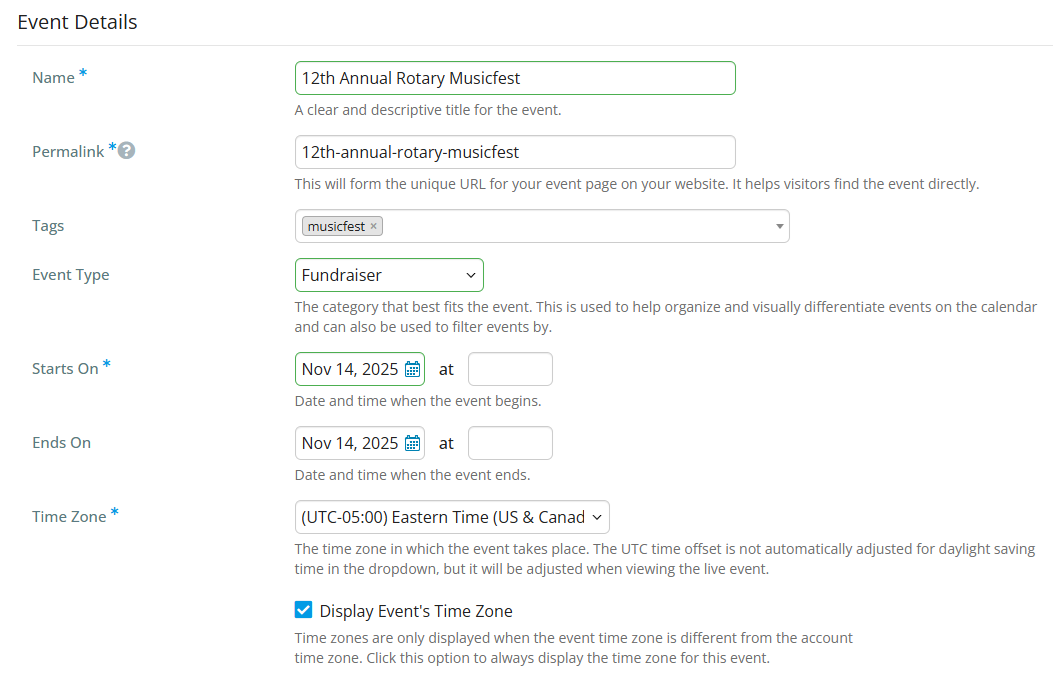
-
You will start by entering some basic information for the event.
-
Name - The name of the event (what will be seen on the club website).
-
Permalink - This is used for the event's URL web address.
-
Code - This helps the organization track the finances within the organization's credit card processor's reports.
-
Starts On - The date and time the event starts.
-
Ends On - The date and time the event ends. The event duration may not exceed 365 days.
-
Time Zone - The time zone the event is in. Please note that when a user views the event’s page and hovers over the event’s time zone, help text displays and shows the event’s start and end times in their own time zone. This makes it easier for the user to know what time the event starts and ends.
-
Display Event's Time Zone - Always show the event time zone when the event is viewed.
-
Event Venue - The name of the event venue. This is displayed on the event and is used on the location line in the ICS file which the attendee can download and save into their personal calendar.
-
Event Address - The address of the event. You'll be able to select an address from the Google Maps autofill as you type, which will load up the map display.
-
Organizer Name - The name of the person or people that are organizing the event. Their name will be displayed on the event details page. When adding event organizers you have the ability to set their role as well as which event email notifications they receive.
-
-
Next, you can enter the descriptions of your event, which will be used to help advertise what the event is about on the event registration pages.
-
Short Description - A short description of the event. This is displayed on the event and is used in the body of the ICS file which the attendee can download and save into their personal calendar.
-
Event Image - An image used for the event.
-
Full Description - A full description of the event.
-
Cover Image - An image used as a banner on the event's landing page on the website. The cover image should be at least 1920px by 1080px, and no larger than 15.00 MB.
-
-
When you've entered all information on this page, click Continue to Tickets in the bottom right.
-
You'll now be on the Tickets & Ecommerce screen, but there are a couple of settings you may want to review elsewhere first. Click Details in the sub-menu bar, then click Edit under "Event Details" as shown in the screenshot below.
There are two settings you may want to set depending on your preference:
-
Display on Events pages - When enabled, allows this event to be displayed on events: listing, grid, and calendar views. It is also displayed in the ClubRunner mobile app.
-
Display on Upcoming Events widgets - When enabled, allows this event to show on upcoming events widgets on the website and in bulletins.
-
-
You are now ready to set up the tickets and ecommerce settings for the event. Click the Tickets & Ecommernce option in the sub-menu bar.
-
Tickets: Click on the Add Ticket button to open a dialog that will ask for the details of a new ticket for the event.
You'll be prompted to set the following details for the ticket:
-
Ticket Name - The name of the ticket.
-
Ticket Code - This helps track the finances within the credit card processor's reports.
-
Ticket Description - The description of the ticket.
-
Minimum Tickets - The minimum number of tickets which can be included in an order.
-
Maximum Tickets - The maximum number of tickets which can be included in an order.
-
Allow Public Registration - An option to allow non-members to be able to register for the event.
-
Default Price - The cost of the ticket.
-
Total Tickets Available - The total amount of tickets available.
-
Prices - This allows different pricing for the tickets based on membership type.
-
Ticket Availability - The date range for ticket sales.
-
Starts On - The date when people can start to purchase tickets (start of day).
-
Ends On - The date when ticket sales will stop (end of day).
Once you've entered all of the details for the ticket and saved it, you'll see it displayed in the list of tickets for the event. You can add additional tickets and edit existing ones as needed.
-
-
Products: This allows you to add additional products that can be sold for the event. Click on the Add Product button in the top right-hand corner of that section to open a dialog that will ask for details about the new product.
You'll be prompted to set the following details for the product, click the Save button in the bottom right of the dialog when finished:
-
Name - The name of the product.
-
Code - This helps track the finances within the credit card processor's reports.
-
Image - An image of the product. Click on load from image library to upload a new image or select an existing image within the Image Library.
-
Description - A description of the product.
-
Minimum Products - The minimum number of products which can be selected.
-
Maximum Products - The maximum number of products which can be selected.
-
Options - Allows customers to select between different options/variations of the same product.
- Three Dots - Click and hold to be able to drag options and change their order.
-
Name - Name of the product.
-
Code - The code of the product.
-
Price - Cost of the product.
-
Quantity - The total number of products available. Once this limit is reached, product sales will close for this product.
-
Arrow - By clicking the arrow, it displays more options.
-
Minimum - The minimum number that can be selected.
-
Maximum - The maximum number that can be selected.
-
Prices - This allows different product pricing based on membership type.
-
Eye icon - This allows you to hide the product option from the event registration process.
-
Trash Can icon - This deletes the product option.
-
Add Option - Allows you to add another product option.
- Conditional by Ticket - This sets the product to be purchasable only if a specific ticket is purchased alongside it.
-
-
Donations: This allows your event to accept donations. Click the Edit button under that section to open a dialog with the donation settings.
Allow donations? - Allows you to enable or disable donations.
GL Account - A drop down that allows you to select which GL Account receives the donated funds.
Donation Message - A text area to add a custom message to share more about the donation.
-
Promo Codes: This allows you to create promotion codes to give discounts for the event. Click Add Promo Code under that section to open a dialog for adding a promo code.
-
Name - The name of the promo code.
-
Code - The code the registrant will use.
-
Discount - Set the discount rate for the promo code.
-
Fixed Amount - How much money the registrant would get off of their event registration fee.
-
Percentage Amount - The percent that the registrant would get off of their event registration fee.
-
-
Limit - How many times the promo code can be used. Leave blank for unlimited uses.
-
Active from - The date of when the promo code can start. Can be blank to start right away.
-
Expires on - The date of when the promo code can no longer to entered. Can be blank for no end date.
-
Usage - Choose when this promo code will be allowed for use on orders.
-
Apply to registration total - Applies the promo discount to the whole registration total.
-
Apply to the total of selected ticket(s) - Applies the promo discount to the selected tickets.
-
-
-
After you have completed the Tickets & eCommerce page, you can review and update the Registration form. To do this, click Form near the top of the page in the sub-menu bar.
The questions displayed are fields the event registrant can fill in. There are two different set of questions.
-
Order Questions - These questions are displayed for the individual who is ordering.
-
Attendee Questions - These questions are displayed for each attendee that the individual is registering.
To add more questions to either of these areas, click on the Add Question button in the respective sections.
The dialog that opens allows you to set the following custom question options:
-
Question Text - The question you would like the registrant to fill in.
-
Question Type - A drop down list of field types.
-
Checkbox - Provides a checkbox for the registrant to select.
-
Dropdown - Provides a dropdown box for the registrant to select from.
-
Long Text - Provides a large text box for the registrant to enter their answer in.
-
Multiple Choice - Provides a list for the registrant to select from. You have an option to display an "Other" option if the registrant does not have their answer listed.
-
Number - Provides a field which only accepts numbers from the registrant.
-
Short Text - Provides a small text box for the registrant to enter their answer in.
-
Single Choice - Provides a list of radio buttons for the registrant to select from.
-
-
Required? - Makes the question required, so the registrant has to answer it.
-
Conditional by question? - The custom question will only show if the set rules that you set are met.
-
-
After you have completed reviewing/editing the form, you can click Settings in the sub-menu bar towards the top of the page to set the payment details and other options.
Click Edit in each section to adjust the settings as needed. The following settings are available to control various options for the event:
-
Event Currency - What currency the event uses for registrations.
-
Payment Options - Select which payment methods should be used when registering for the event.
-
Allow credit card payments - Allows you to enable or disable credit card payments for the event. You can also select other credit card processor accounts if you have more than one.
-
Add Service Fee to all registrations - A service fee allows you to help offset the cost of the transaction from the payment processor via a percentage cost or a flat fee. These fees are applied to the total order value when paying online during checkout.
-
Allow check payments - Allows you to enable or disable check payments for the event.
-
Allow bill me later - Allows you to enable or disable an option for the registrant to pay at a later date for the event.
- GL Account: A drop down that allows you to select which GL Account receives the event funds.
-
-
Invoice Settings - Adjust settings for event invoices.
-
Invoice Date: This is preset to the event registration date.
- Due Date: You set when the payment due date is for the event invoice, either a number of days/weeks/months from the event, or a fixed date.
-
-
Public Registration Settings - Adjust registration settings for people who are not club members.
-
Allow attendees to edit registration - Allows attendees to edit their registration details and questions.
-
Allow members to view attendees list - Allows members to view the list of attendees.
-
-
Administrator Registration Options - Adjust settings for events registered by an administrator.
-
Send all email notifications when the administrator registers someone on their behalf - This will enable email notifications to the attendee, buyer, and event organizer.
-
Send invoice to the buyer when the administrator registers them on their behalf - Sends a copy of the invoice to the buyer if administrator registered them on their behalf
-
-
Email Notification Templates - Displays the notifications and email templates which are sent to registrants, attendees, and the event organizer. The email templates which are used can be changed by clicking the Edit button. To view or manage the email templates, click the Manage Email Templates button.
-
Event Reminder - Allows you to create multiple scheduled email reminders to the event registrants and/or orders based on a customized campaign schedule. These can be created by clicking the Add button.
-
Success Message - A message that appears after the registrant successfully completes their purchase. This can be edited by clicking on the Edit button.
-
-
Once everything is set and you're ready for the event to go live, click on the Publish button in the top right-hand corner of the page. This will change it from a draft to a live event.
To view the event on the website, click the View button after publishing.